Created date: 29-08-24 | Updated date: 24-10-25 | Plugin version: 1.5.1 | API version: 100
Mastercard Gateway for Magento, OpenCart, PrestaShop and WooCommerce
Hosted Session Configuration
This section explains the options available for configuring a Hosted Session. Each option is designed to help you customize the session to suit your business needs. Follow this guide step by step to understand how to set up and personalize the Hosted Session.
Enabling the “Mastercard Gateway Payment option”
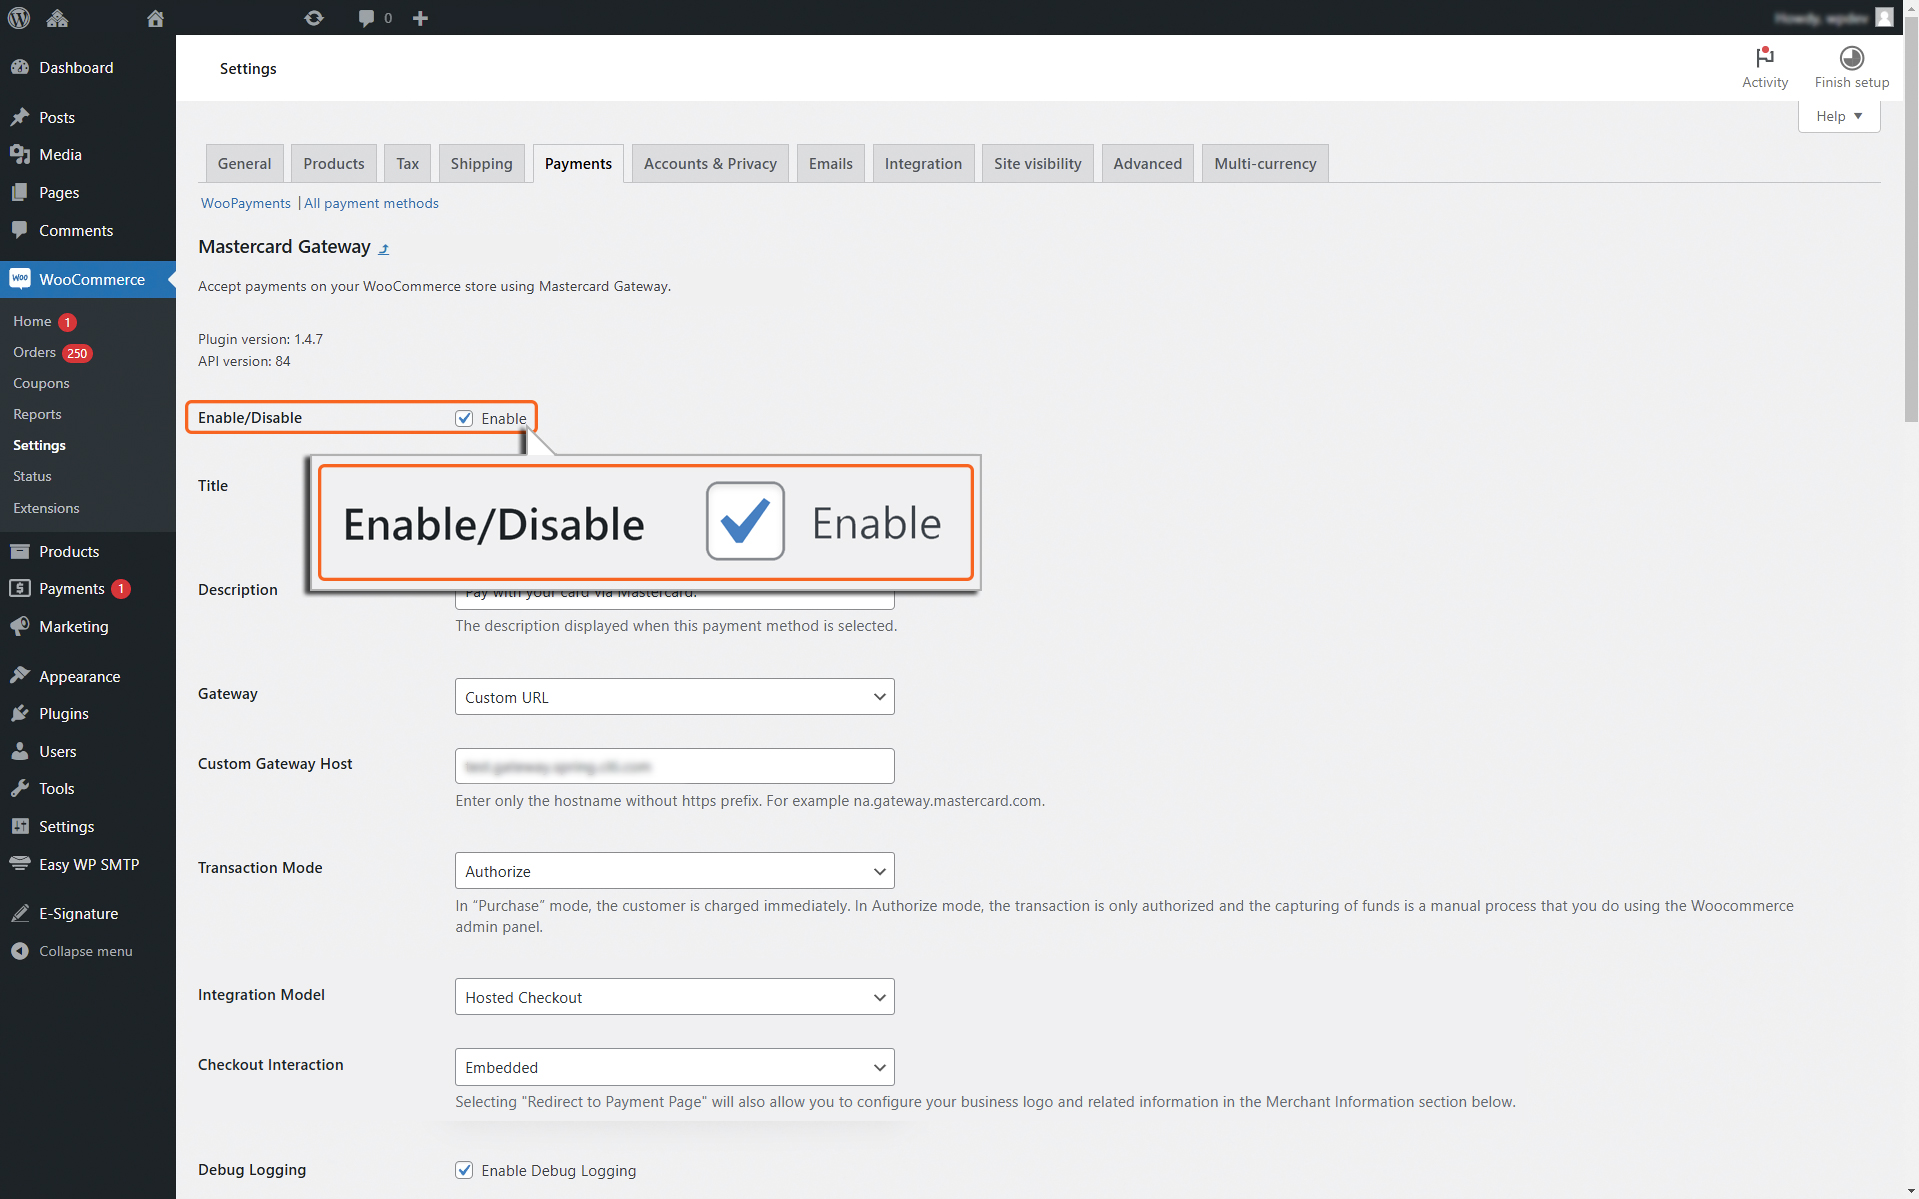
Enable/Disable
Check the checkbox to enable the Mastercard Gateway Payment option. This step activates the configuration needed for this payment option as well as enables the same in the checkout page.
Adding “Title” & “Description”
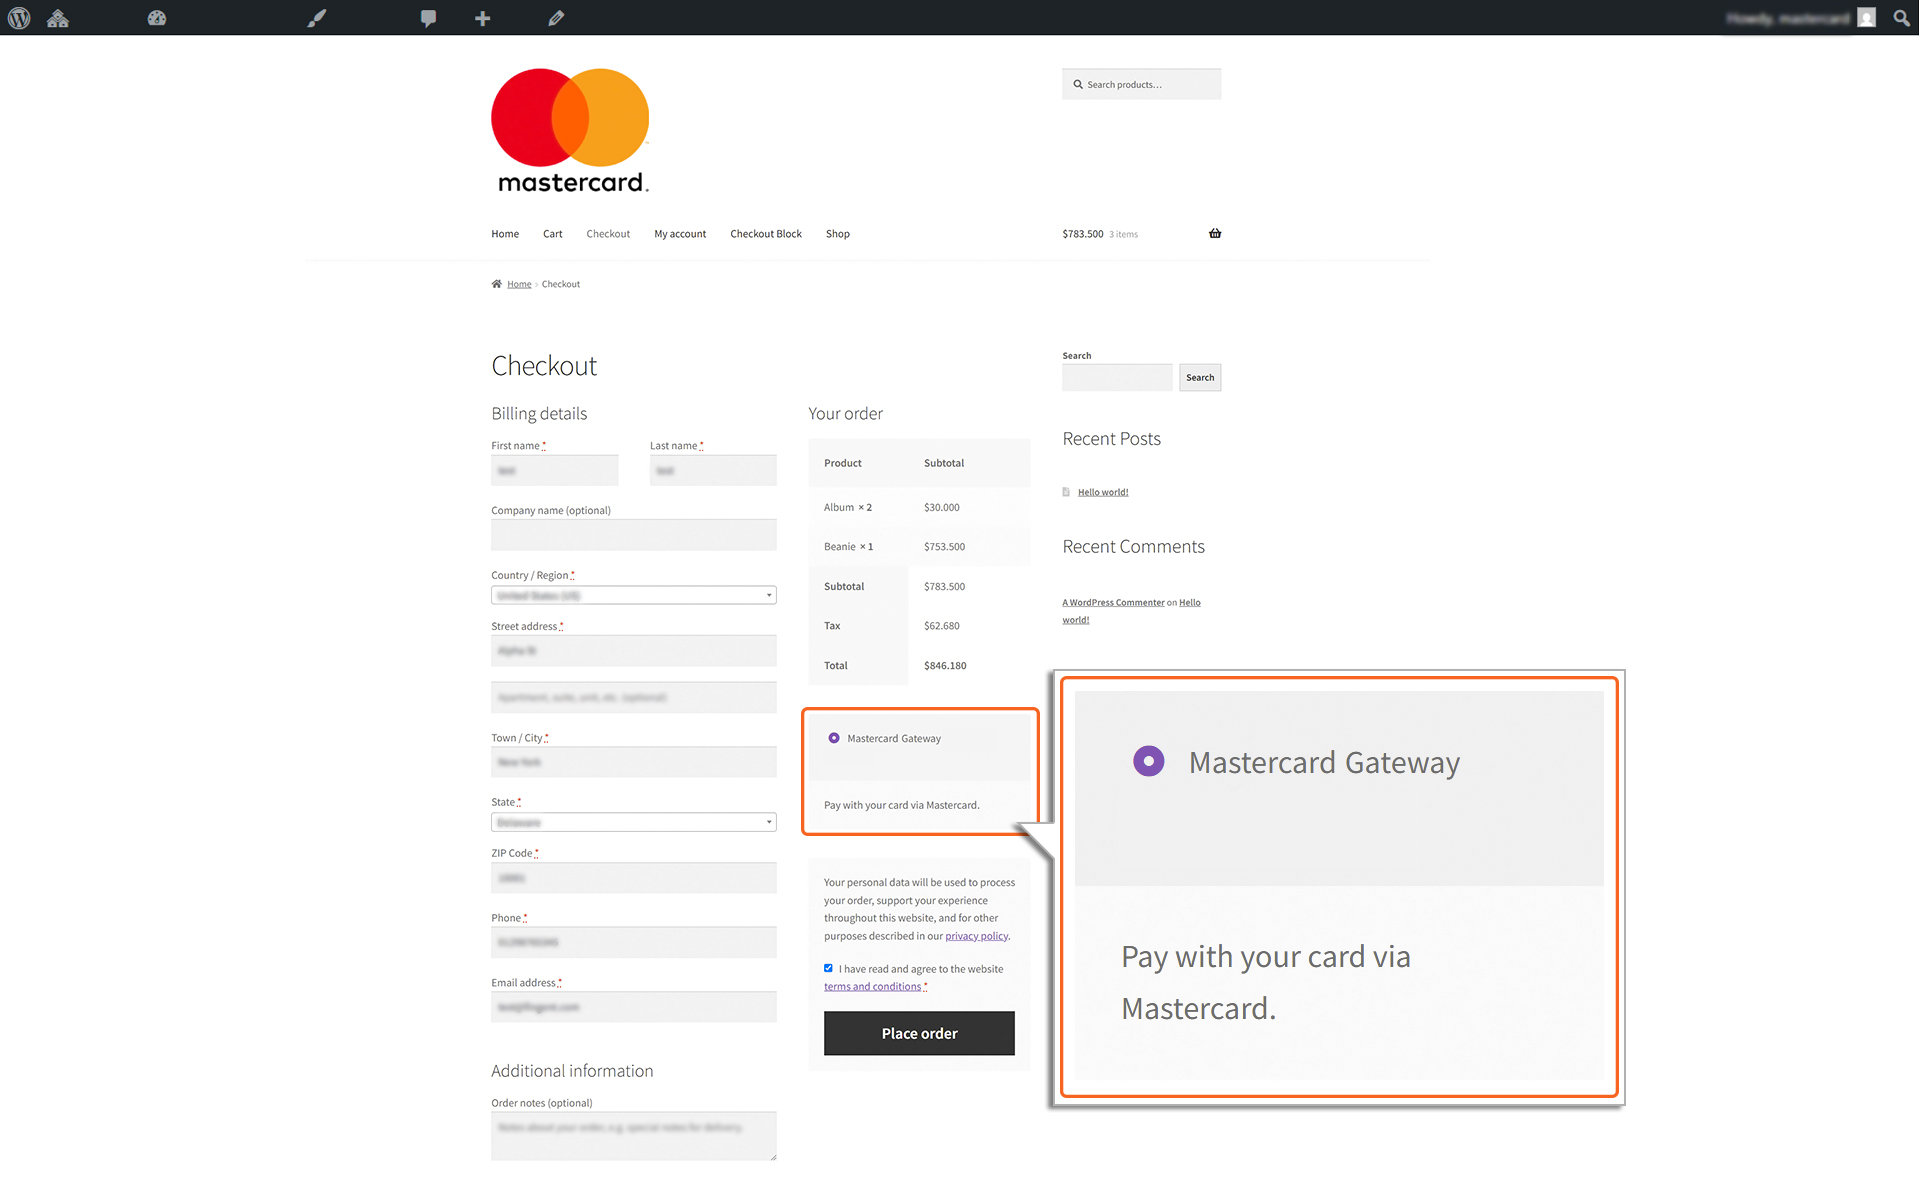
”Title” & “Description” displayed in Checkout page
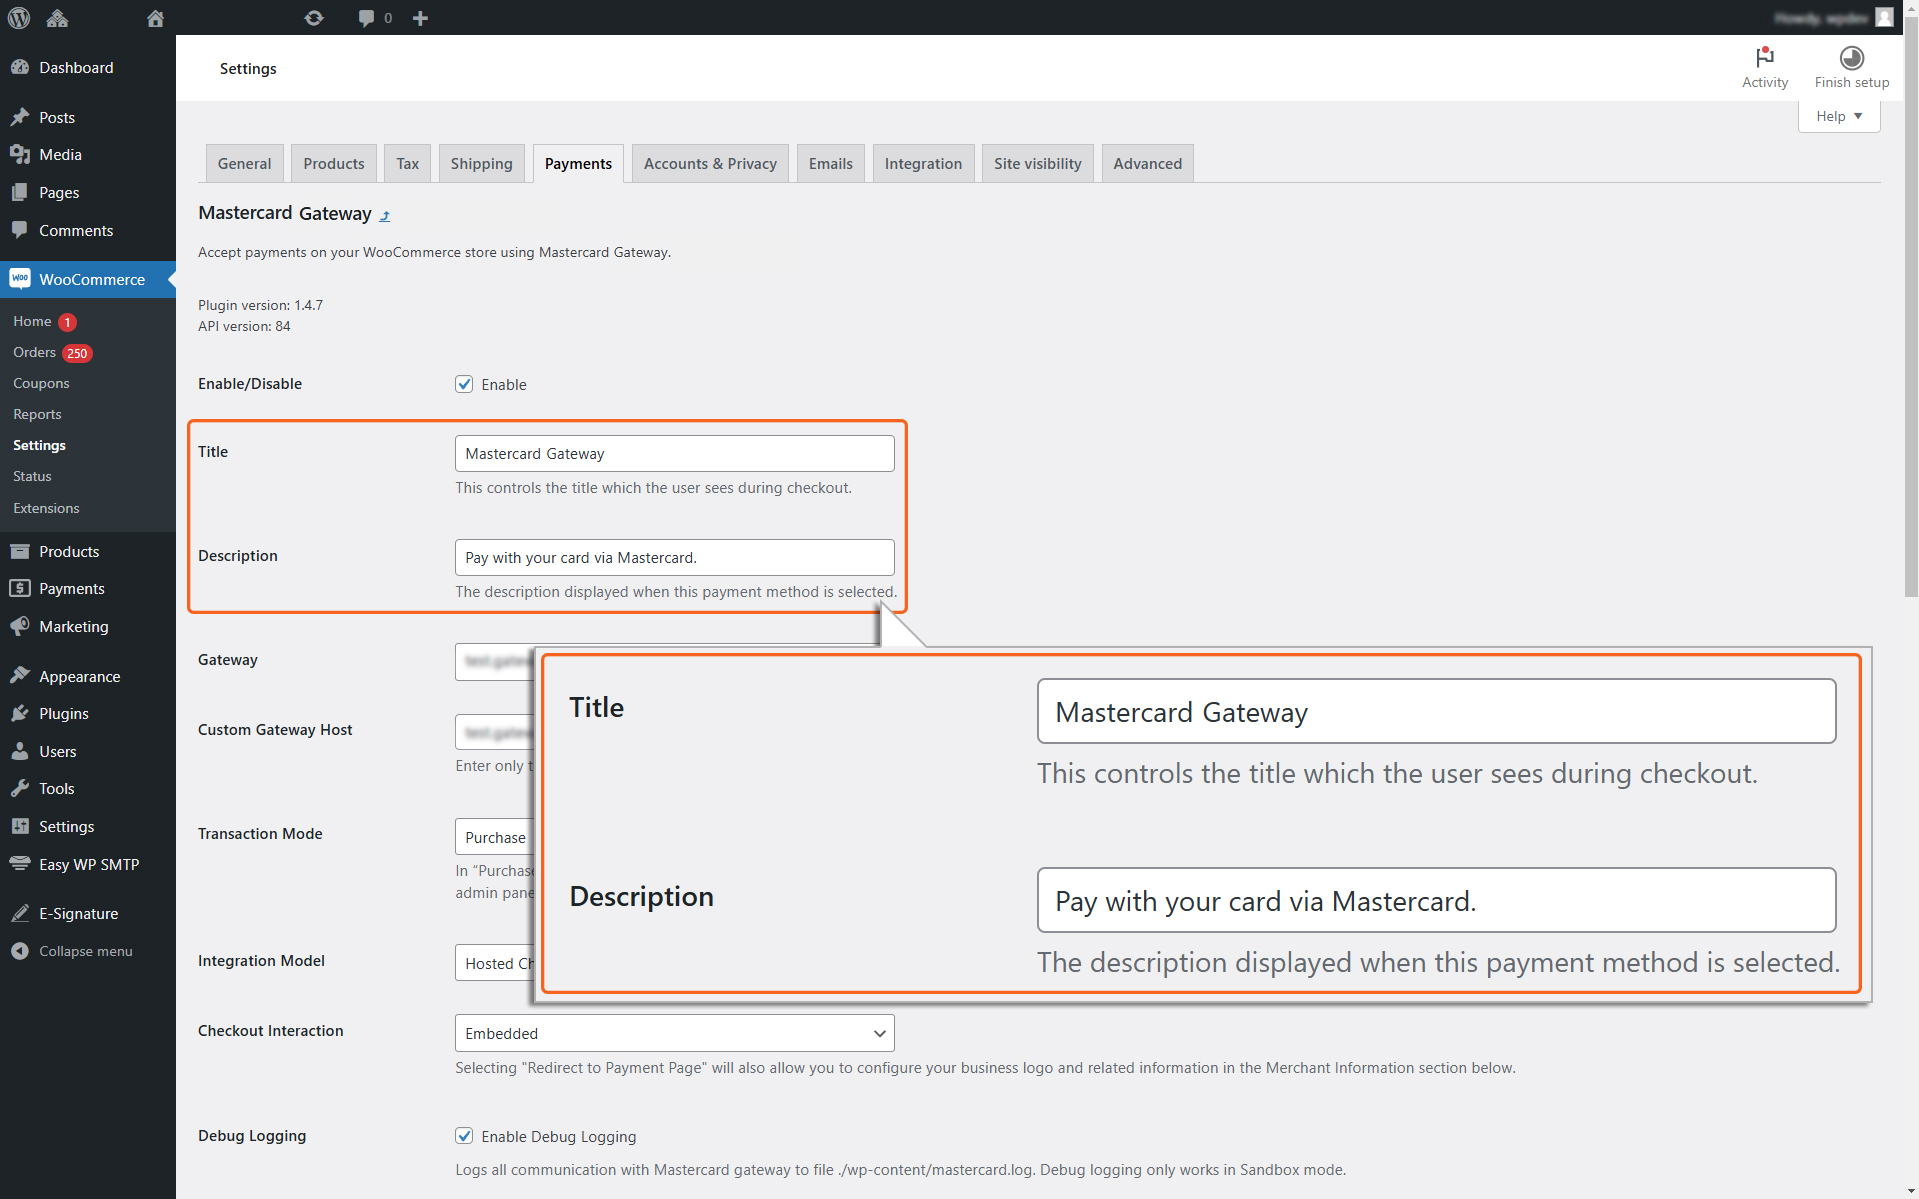
Title
Type in a name or label for this payment method. This is what your customers will see on the checkout page when choosing how to pay. Make sure the label is clear and easy to understand.
Description
Enter the description for this payment method as you want it to appear on the checkout page for customers.
Gateway, Custom Gateway Host
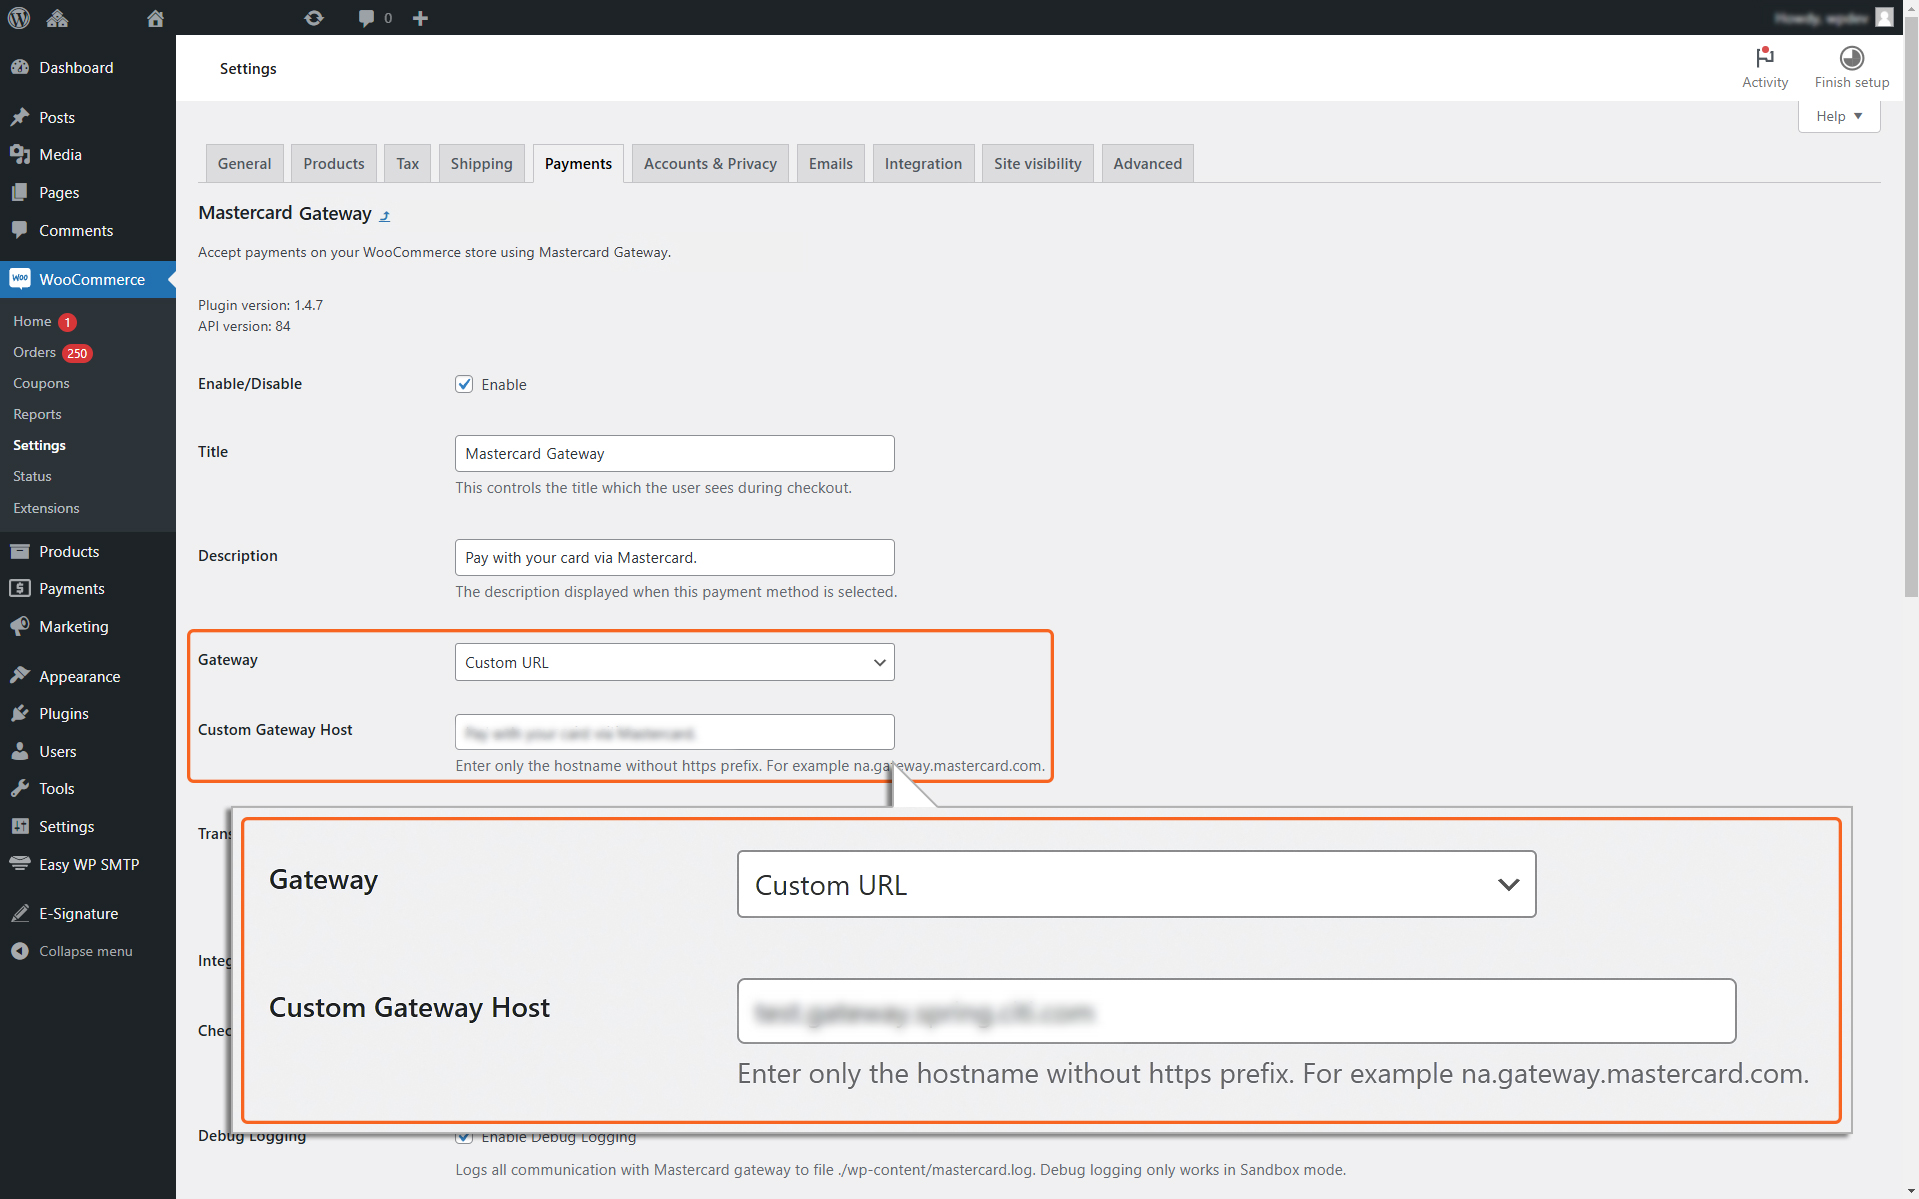
Gateway
Select “Custom URL” as the Gateway to enable entry of the Custom Gateway URL provided by your payment service provider. This is required to establish a successful connection with the gateway.
Custom Gateway Host
Enter the custom URL provided by your payment service provider.
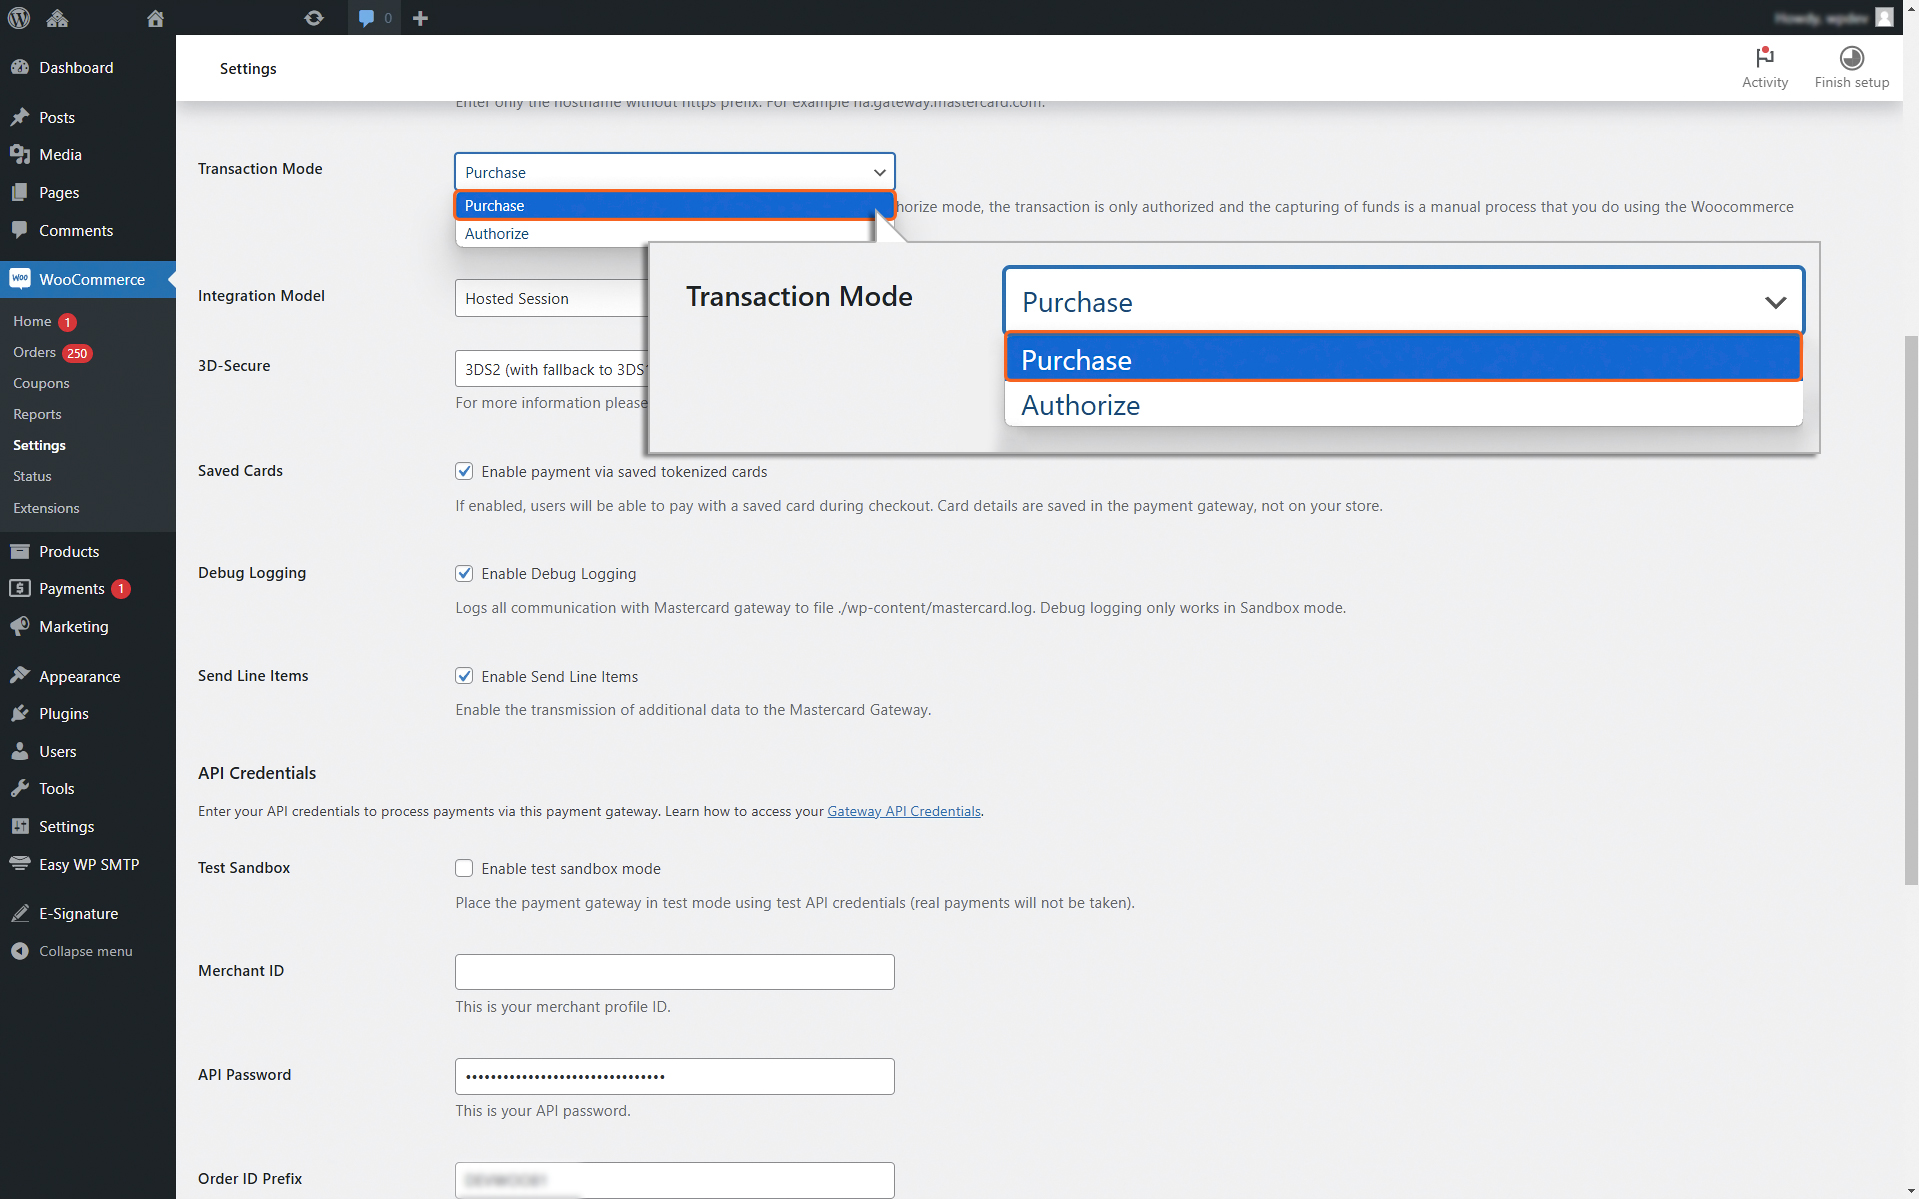
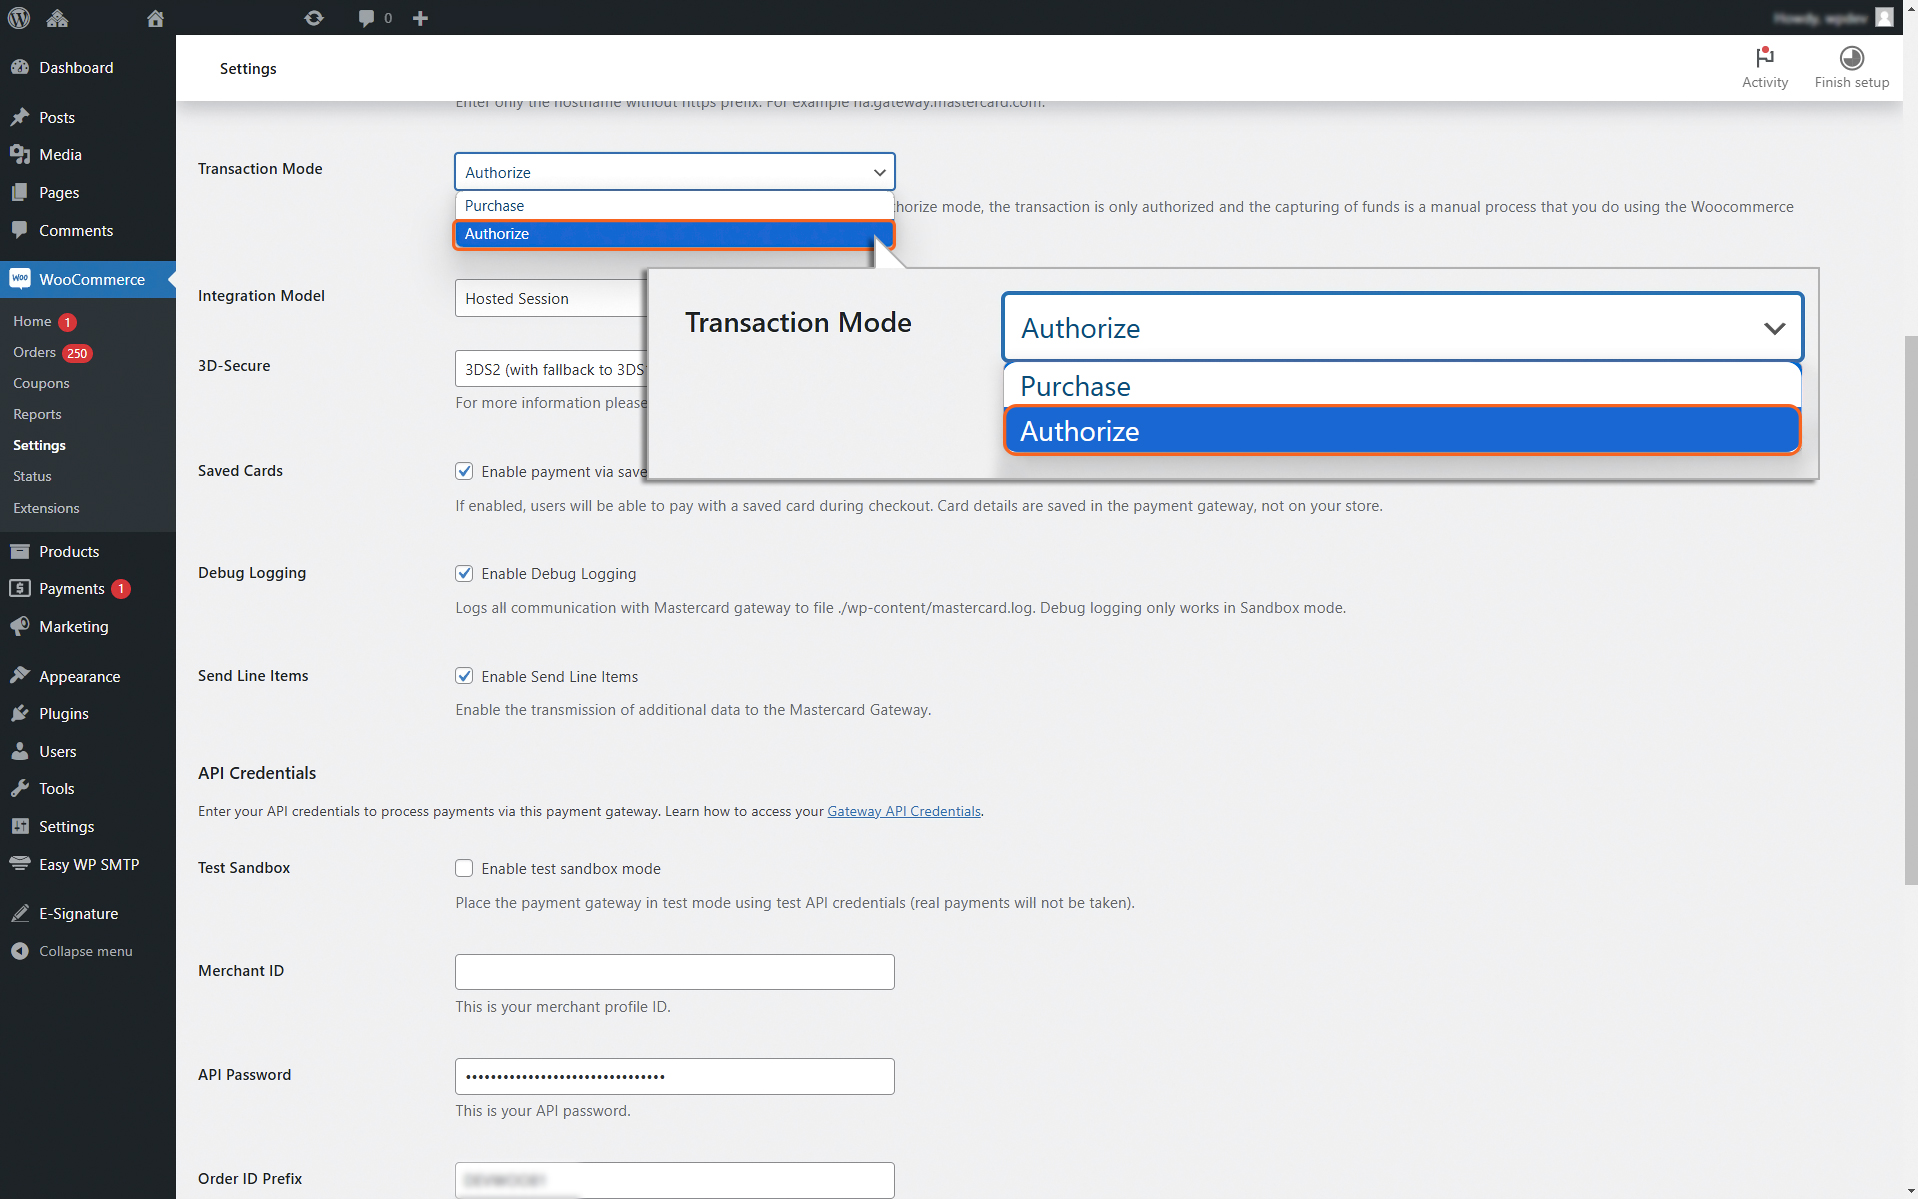
Transaction Mode
Transaction Mode - Purchase
1. Purchase
If you choose the ‘Transaction Mode’ option as Purchase, the payment process will happen automatically. Here’s how it works:
When a user enters their card details and submits an order, the total amount of the order is immediately deducted from their card.
This amount is then automatically transferred to the merchant’s account.
Please note that while the transfer is automatic, it might take a little time for the amount to show up in the merchant’s account. However, no additional action is required from either the user or the merchant to complete the process.
Transaction Mode - Authorize
2. Authorize
If you choose “Transaction Mode” as Authorize, you will need to manually process the transaction to accept the payment. This means you must take an additional step to capture the payment amount.
The manual capture of funds is done through the Backend. Detailed instructions for this process can be found in the Managing Transactions section of this document.
The Authorize payment method works in two steps:
Authorization happens during checkout. This ensures the payment method is valid and reserves the funds.
Funds capture happens later. The money is only deducted after the merchant invoices the order.
This method gives you more control but requires you to complete the capture process manually within the stipulated timeframe configured for your MID.
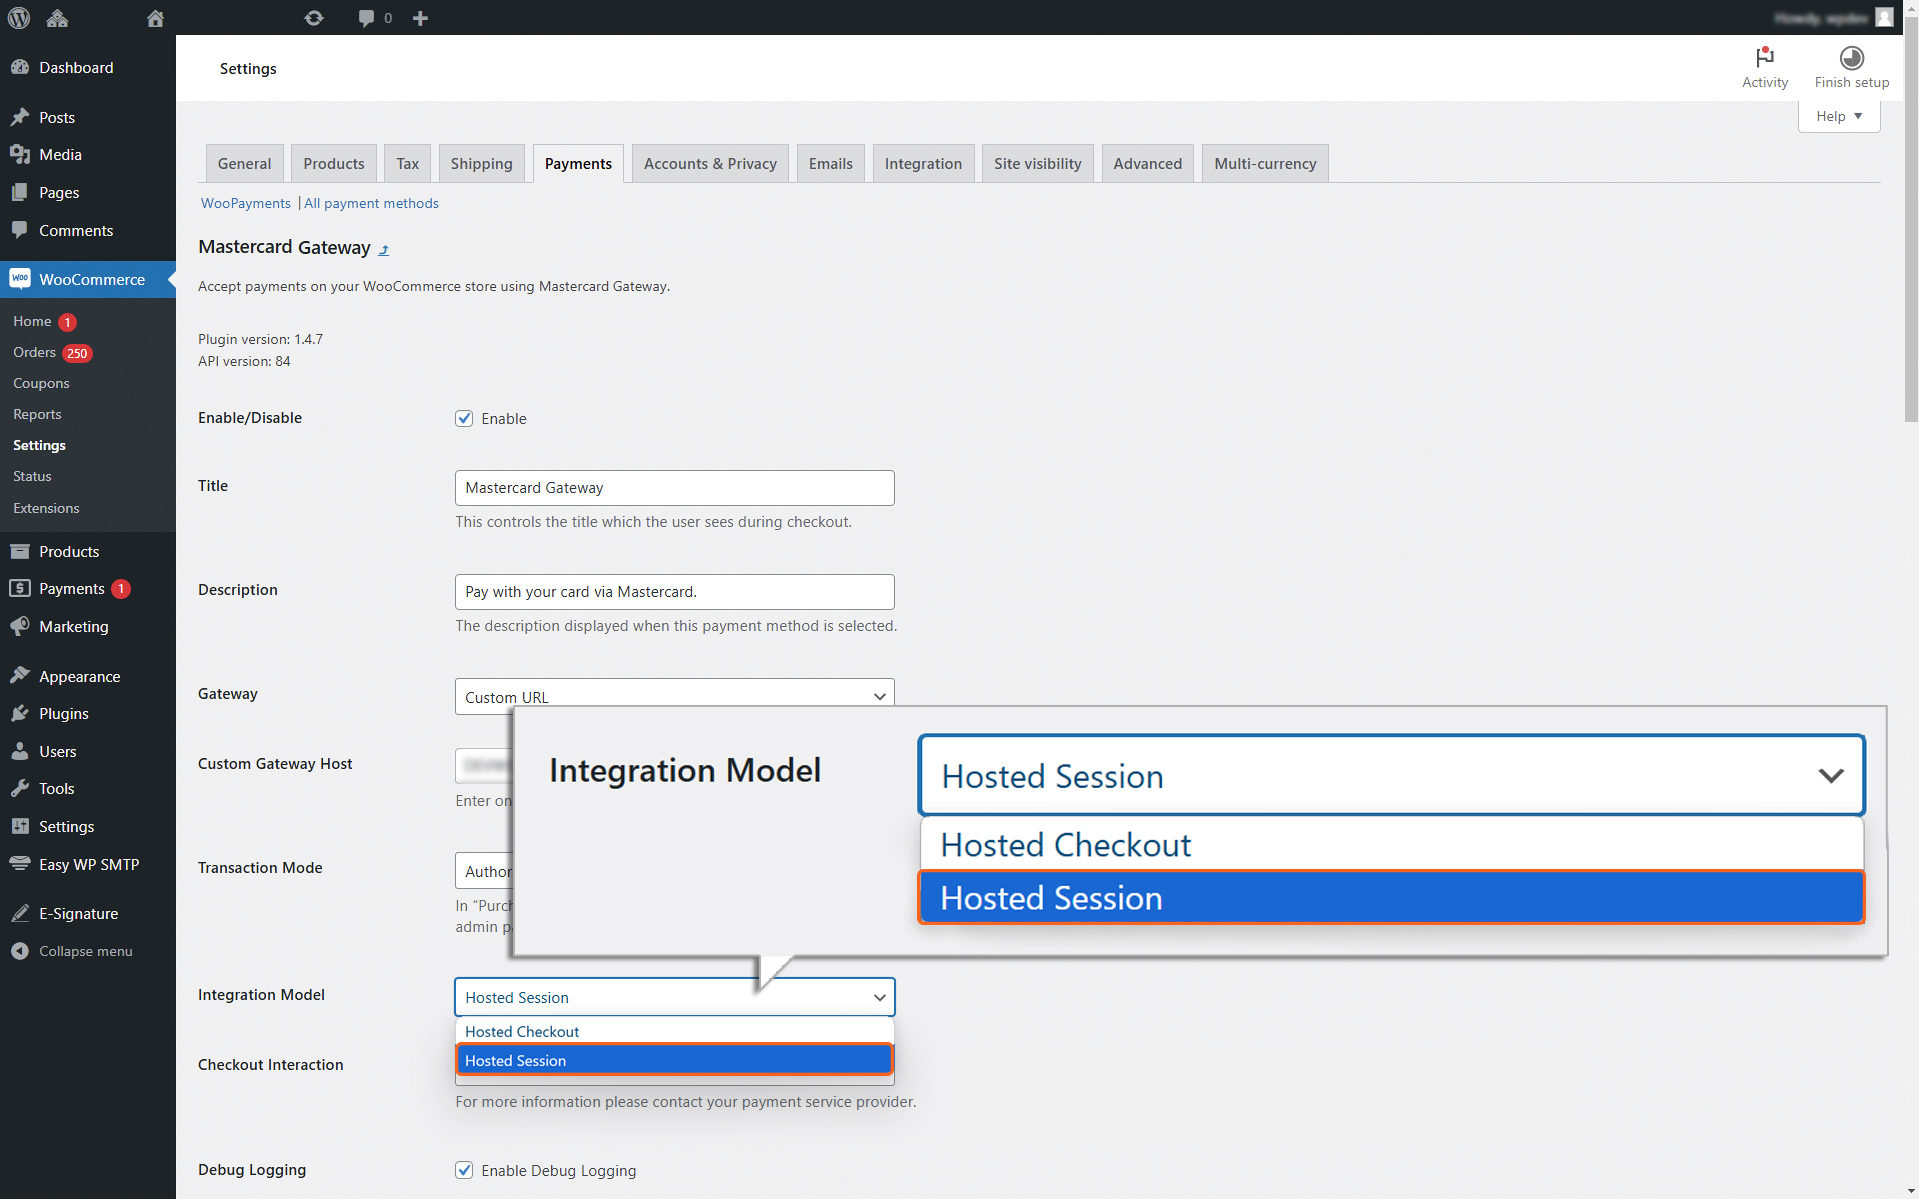
Integration Model > Hosted Session
Integration Model
Choose the integration model as Hosted Session.
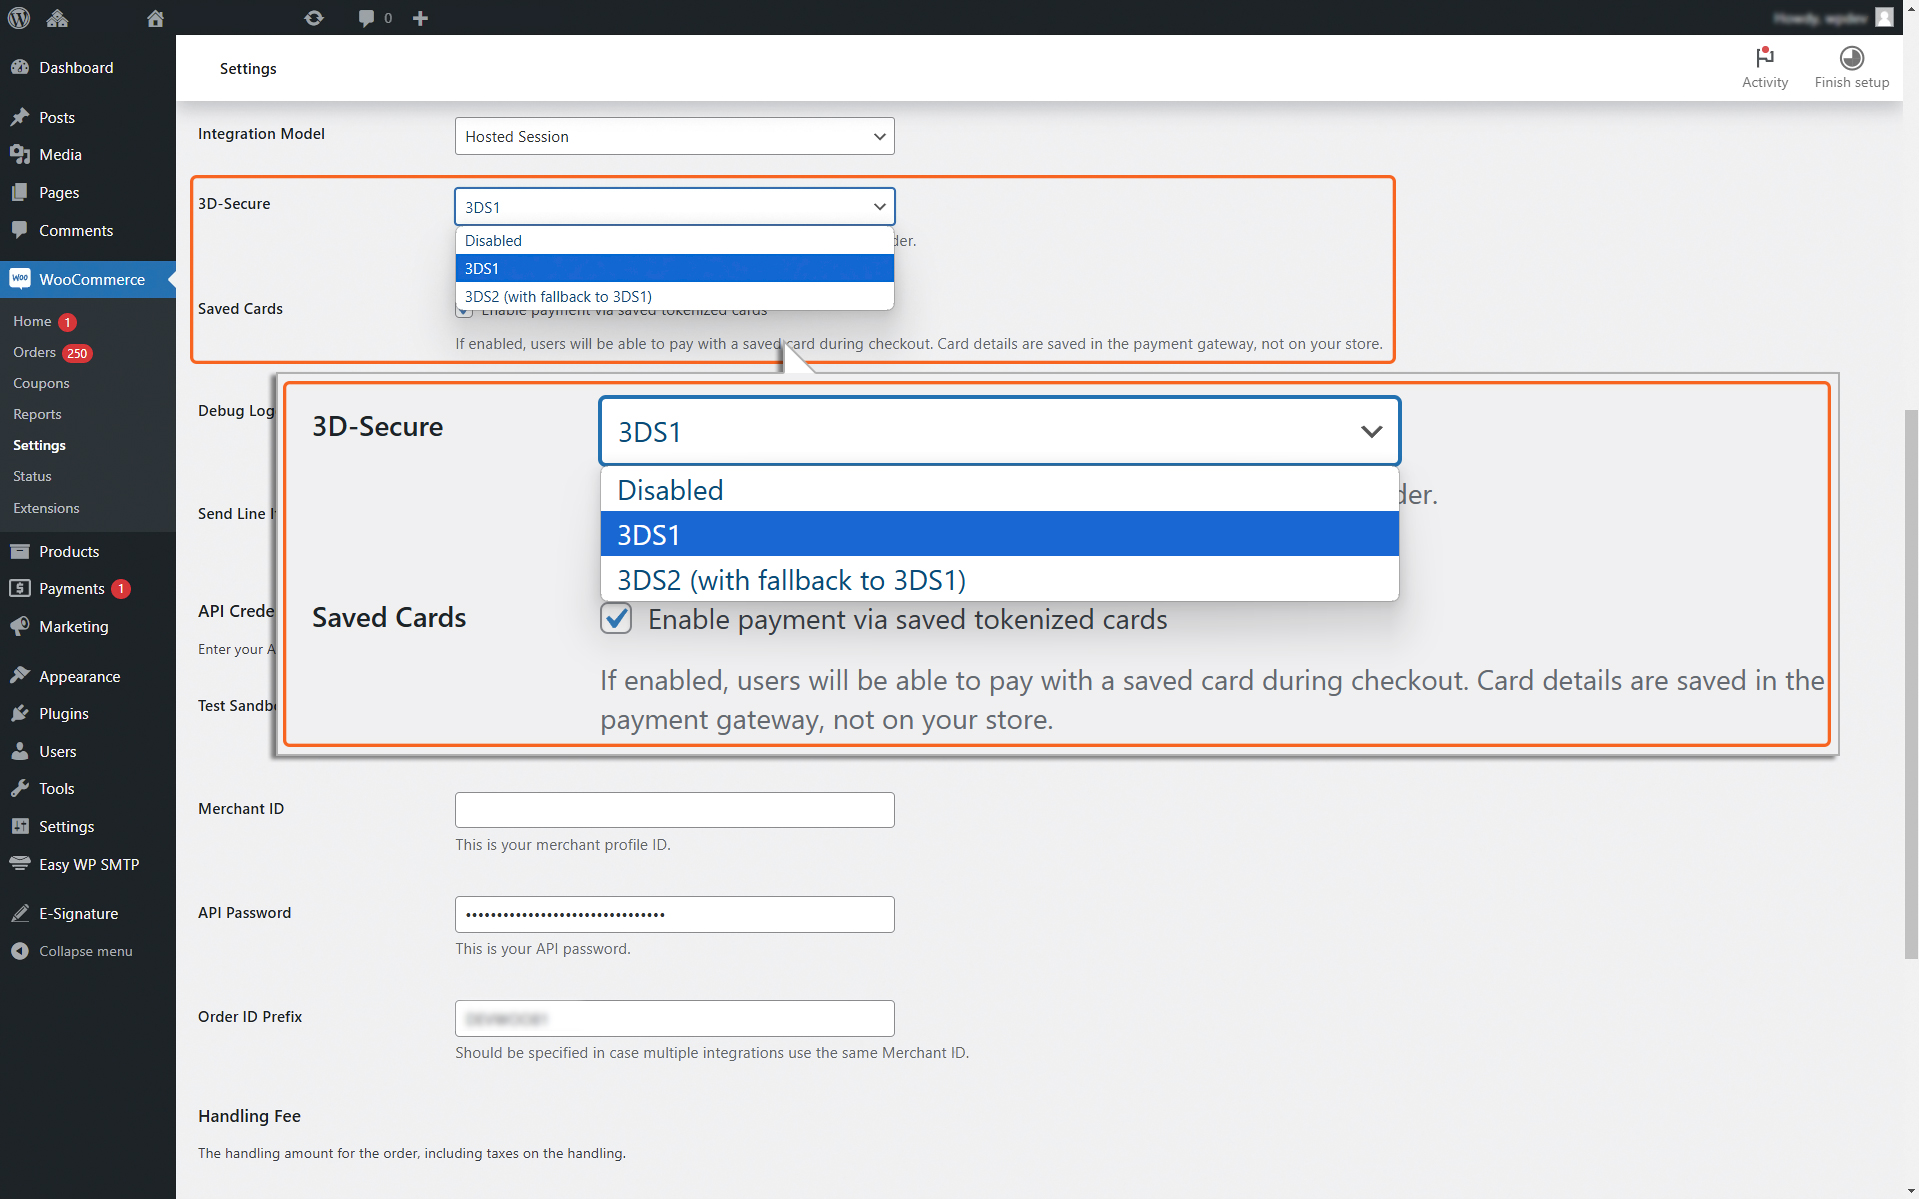
Enable 3-DS
EMV 3D-Secure
This option lets you select the security level for the user’s card during transactions. Here’s what each level means:
Disabled:
If you choose this option, the order will be processed once the card details and the order itself are verified.
No additional steps, such as entering a password or PIN, will be required from the payer.
EMV 3-D Secure v1:
This level adds an extra layer of security.
The cardholder must authenticate themselves by entering a password they previously registered with their card issuer.
This is the latest and more advanced version of 3-D Secure.
It improves security and reduces interruptions for low-risk transactions.
Here’s how it works:
The card issuer’s Access Control Server (ACS) assesses the transaction risk using details like merchant-provided data, browser fingerprinting, or past interactions with the payer.
If the transaction is low-risk, it proceeds smoothly without asking for additional input.
For higher-risk transactions, the payer may need to complete a challenge, such as entering a PIN or answering a security question.
Supported schemes include:
Mastercard SecureCode™
Verified by Visa™
American Express SafeKey™
JCB J/Secure™
Diners Club/Discover ProtectBuy™
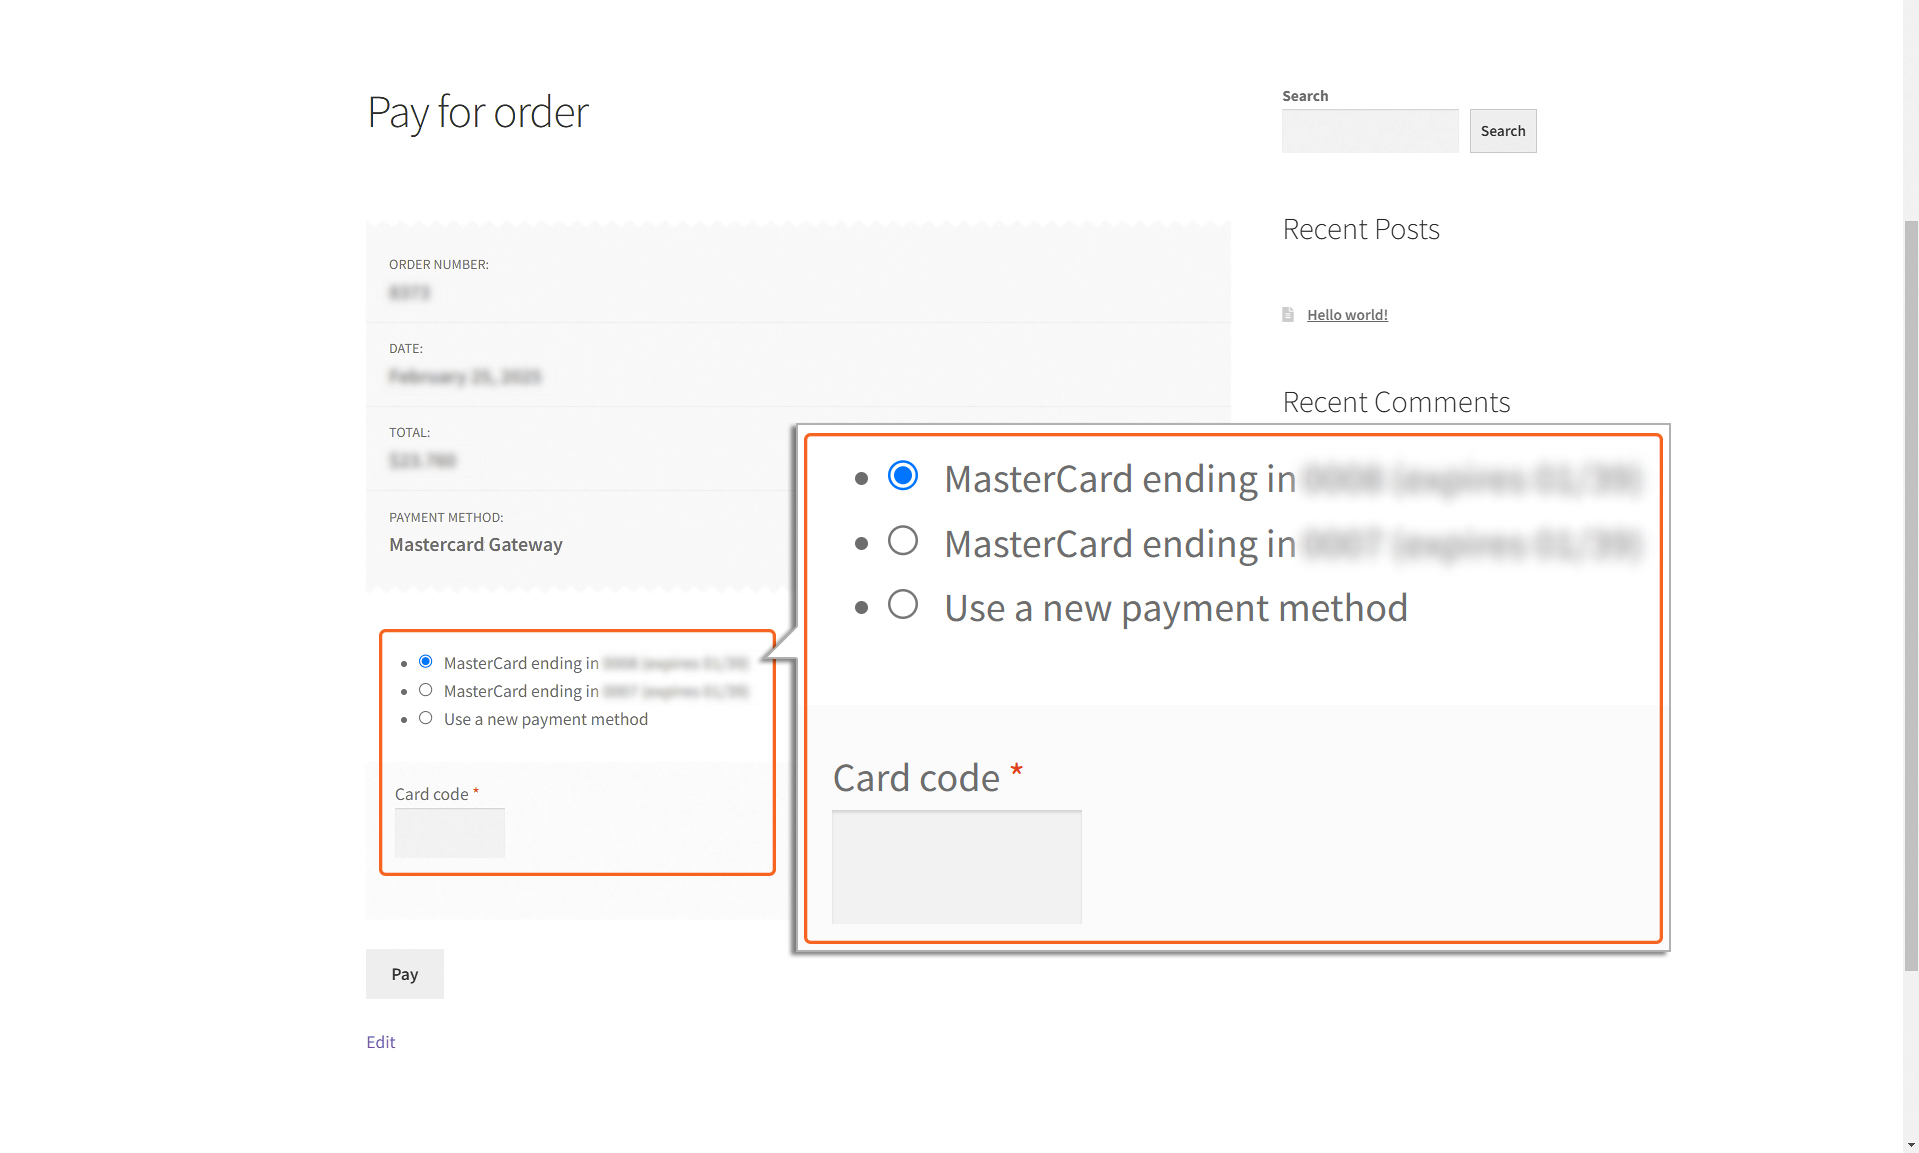
Saved Cards
Saved Cards
Note
The “Enforce CSC on Transaction Sources” setting should be enabled for the MID to ensure that entering the CSC/CVV is mandatory for customers to proceed with the payment.
When this feature is enabled, customers have the option to save their payment details for future purchases. Their information is securely encrypted and stored using tokenization by Mastercard Gateway. No card details are stored on the website itself. Instead, the payment gateway generates a unique payment token that is linked to the customer’s payment method.
This token serves as a secure reference for transactions, allowing payments to be processed without exposing sensitive card details. However, for security reasons, customers will still need to enter the CSC/CVV code found on the back of their card next to the signature panel. By using this system, your business reduces the need to manage unencrypted payment data, which significantly lowers the effort required to meet PCI compliance standards—rules designed to keep payment data secure.
Debug Logging, Send Line Items, Test Sandbox
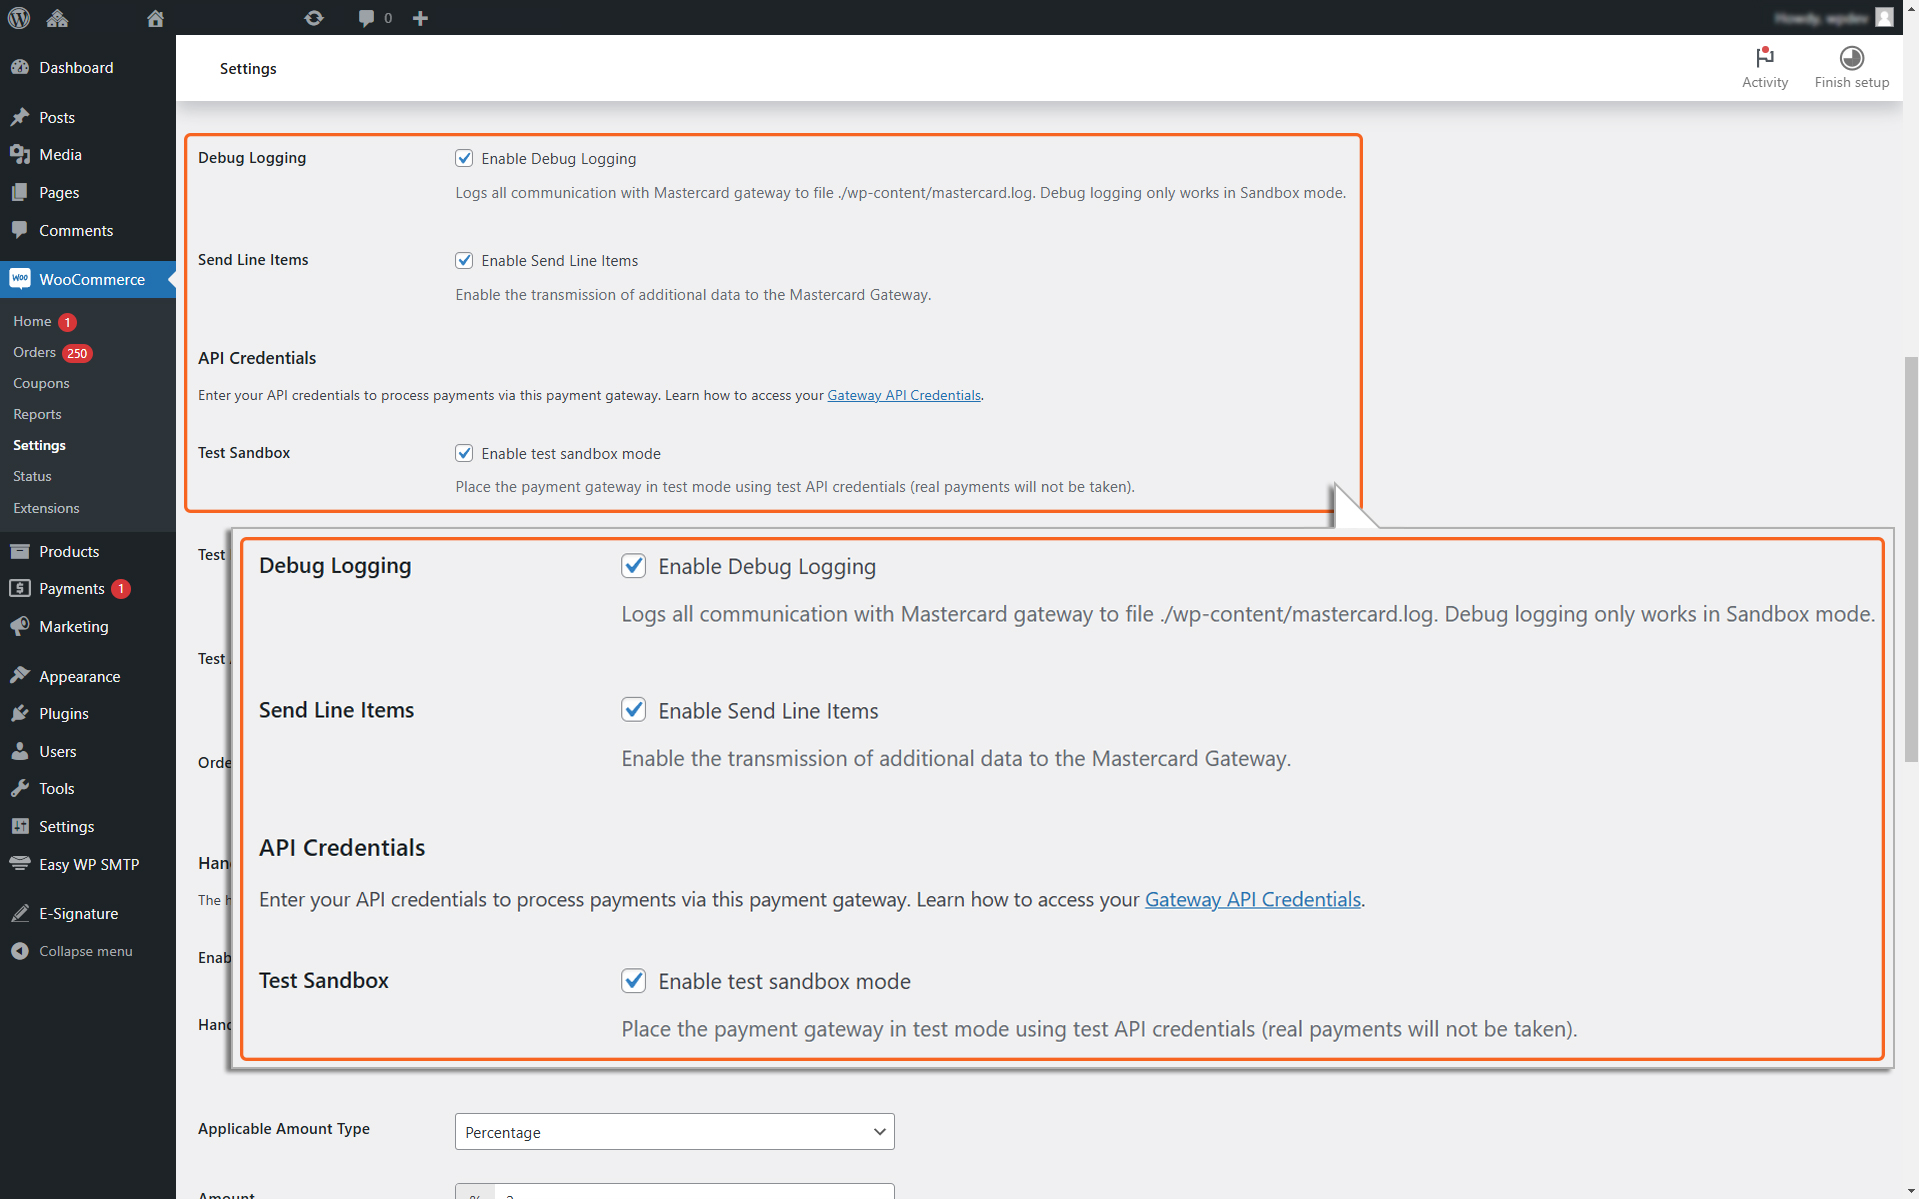
Debug Logging
Enable this option to log data into ./wp-content/mastercard.log. Please note that logging is only available if the Test Sandbox Mode is enabled. Debugging creates detailed logs that can help you identify and fix issues with your payment process.
Send Line Items
Enable this option if you want to include detailed order information (like item names, quantities, and prices) in the transactions sent to the Mastercard Gateway. This helps with tracking and provides more details for reporting.
Enable to use test credentials (API username prefixed with TEST).
Unselect to switch to live production mode.
Recommendation: Always test in Test mode before switching to Live mode.
Test Merchant ID, Test API password, Order ID Prefix
Note
Please set up your Merchant credentials in TEST mode and ensure that everything functions correctly.
Test Merchant ID: Enter your test Merchant ID.
Test API password: Enter the API Password obtained from your merchant account.
If you have unchecked the ‘Test Sandbox’ option, the fields below will be displayed as Merchant ID and API Password
Merchant ID: Enter your Merchant ID.
API password: Enter the API Password obtained from your merchant account.
Note
Learn more about how to generate your API Password.
Order ID Prefix
Enter the order ID prefix. This is necessary in case multiple integrations utilize the same Merchant ID. This precaution helps prevent the occurrence of duplicate Order IDs, which could potentially result in payment issues.
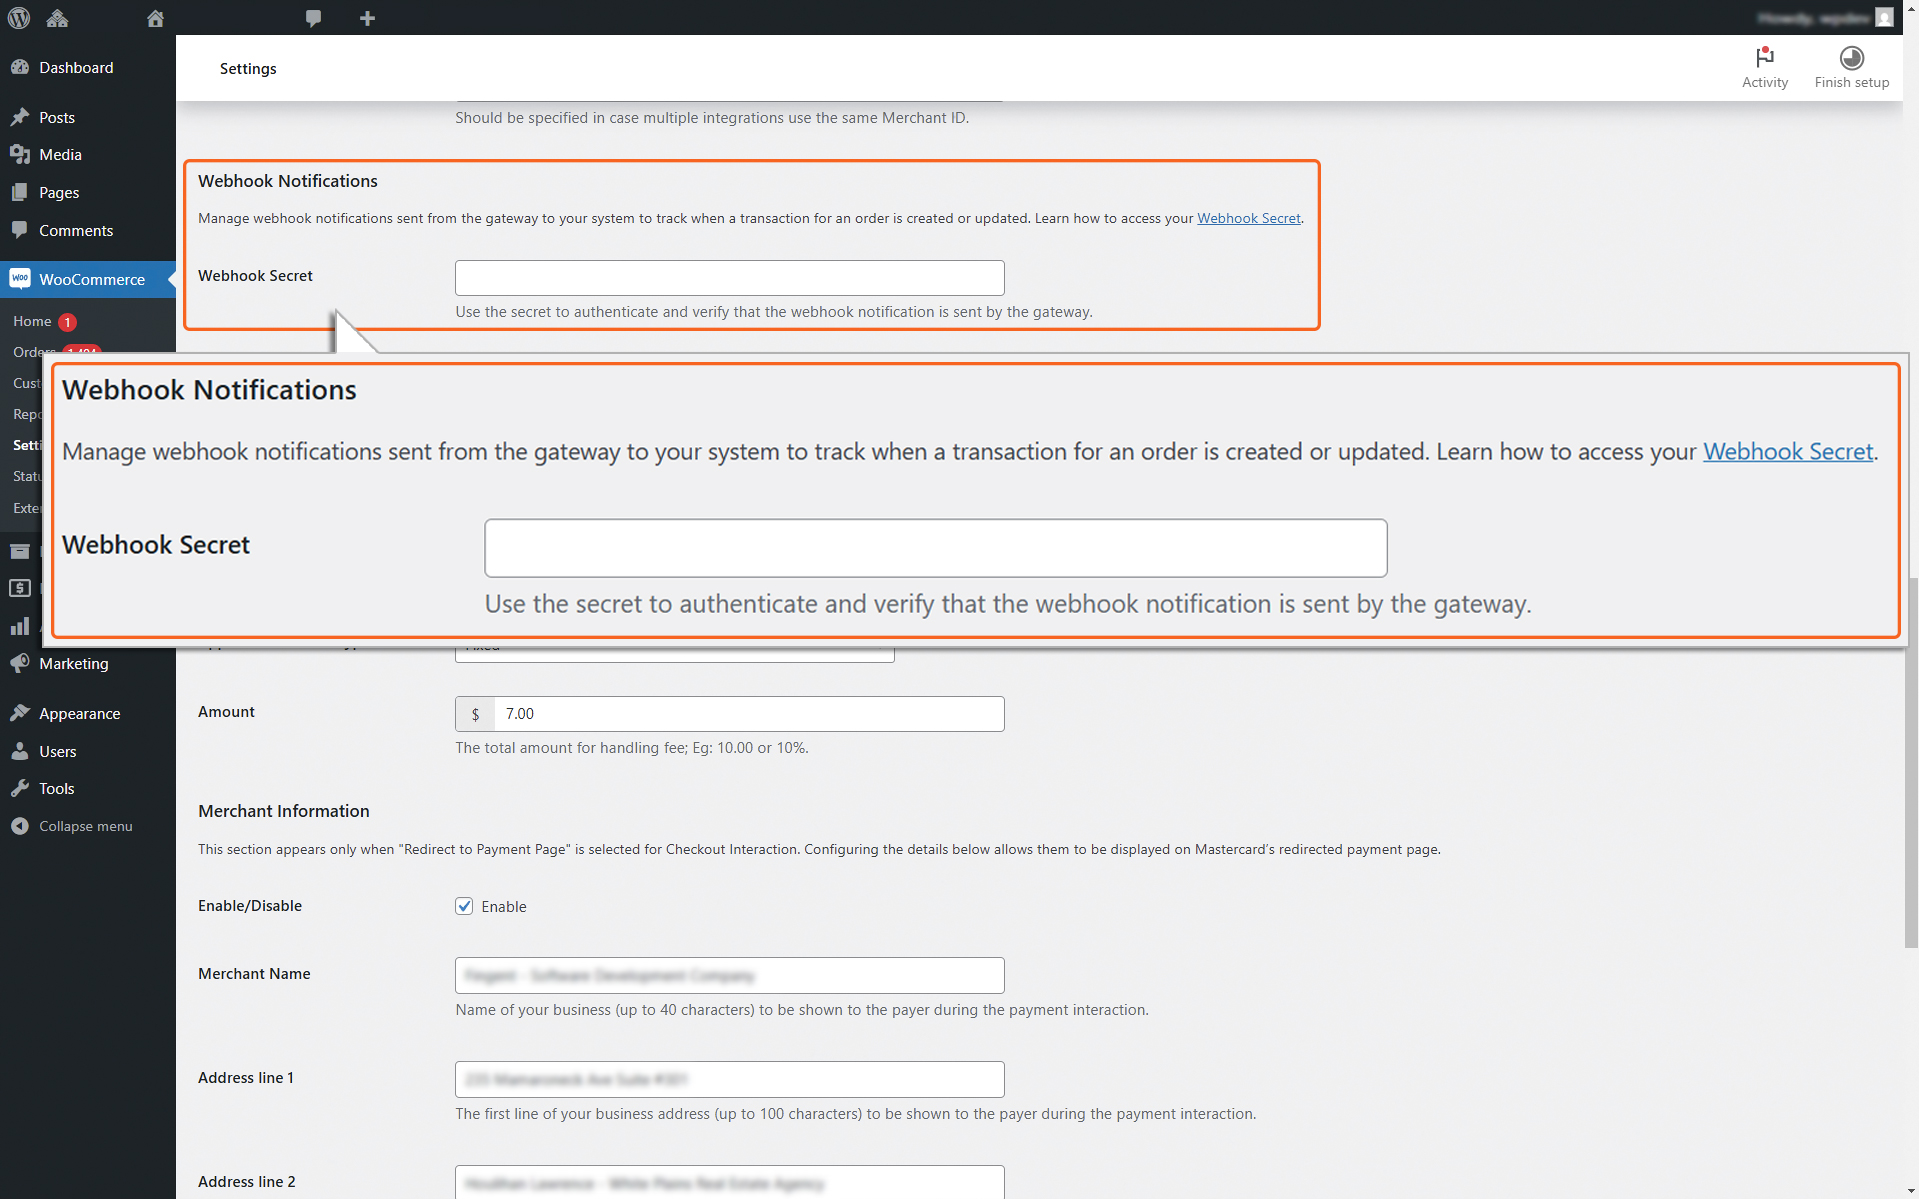
Webhook Secret
Webhook Secret
Enter the WebHook secret from your merchant account. Please refer to API Configuration to obtain the Webhook Secret.
Note
The plugin automatically includes the Notification URL, so manual configuration in the Merchant Administration portal is not required.
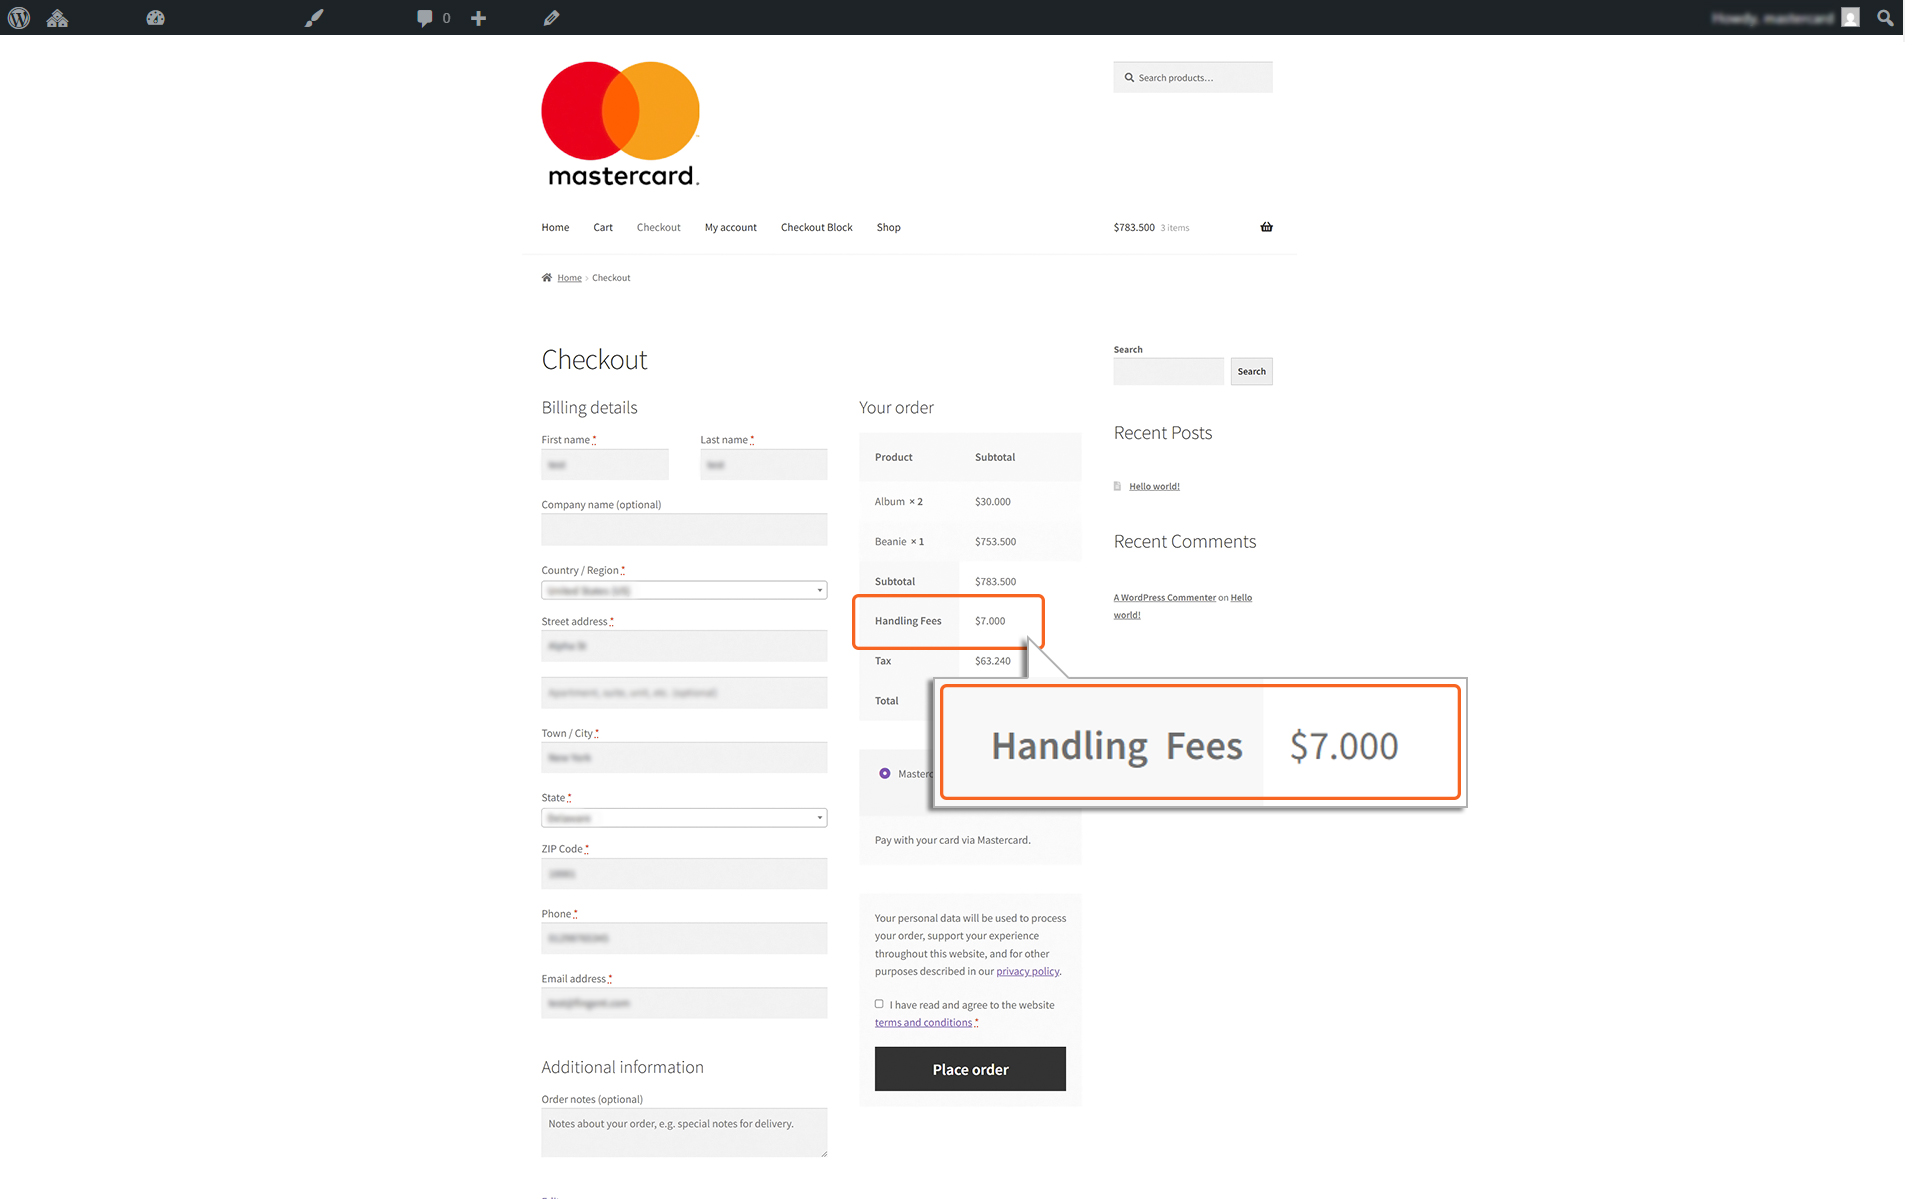
Handling Fee
Handling Fee
This option allows you to add extra fees at checkout. The fee can be applied as either a fixed amount or a percentage of the subtotal.
Enable/Disable: Check the ‘Enable’ option to activate the handling fee feature and include it in the cart total.
Handling Fee Text: Enter the text to be displayed in the front-end checkout page.
”Handling Fee Text” displayed in Checkout page
Applicable Amount Type: Select either “Fixed” or “Percentage” from the dropdown menu to determine how the handling fee will be calculated.
Amount: Enter the specific amount if “Fixed” is selected or enter the percentage to be applied to the subtotal if “Percentage” is selected.
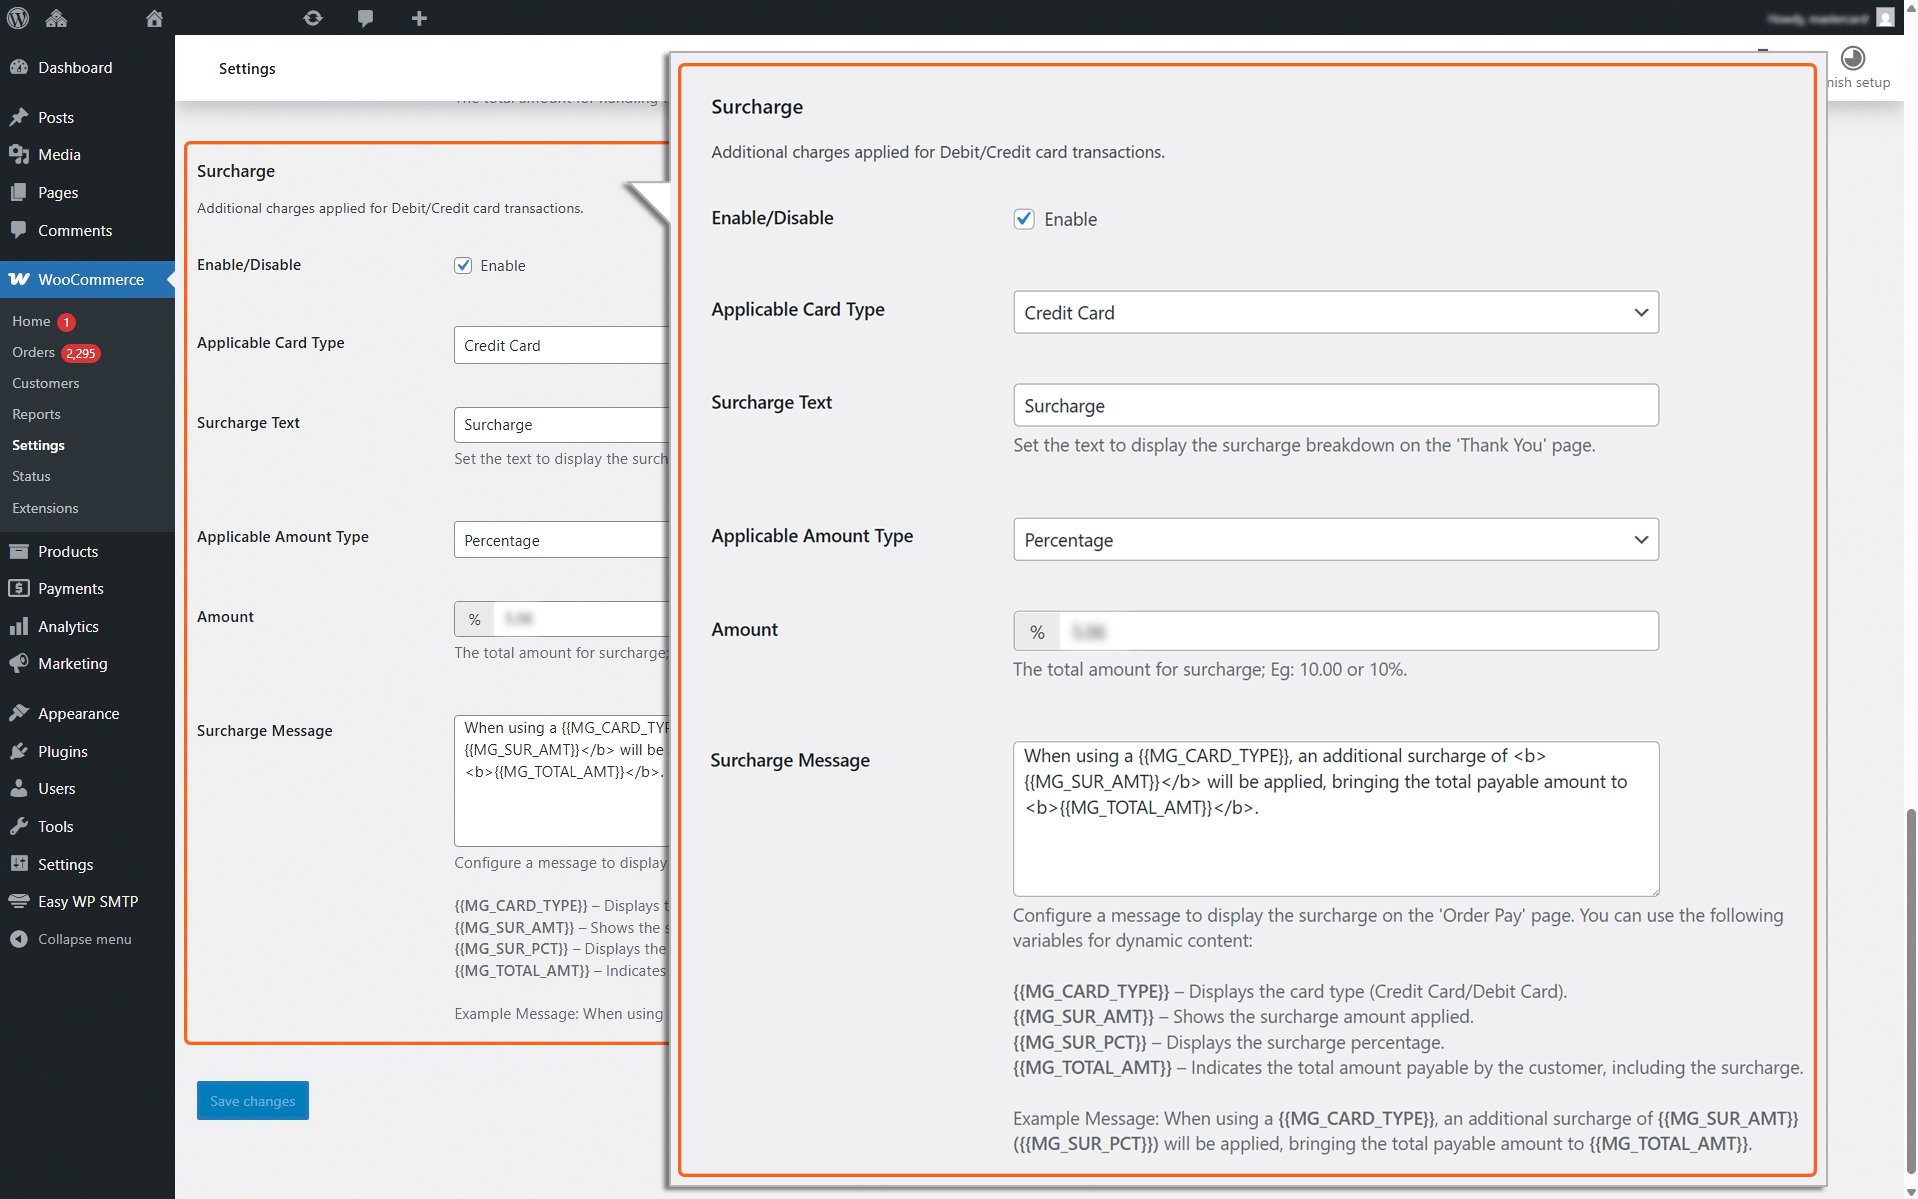
Surcharge
Surcharge
This option allows you to add Surcharge at order pay page. This amount can be applied as either a fixed amount or a percentage of the total payable amount by the customer.
Enable/Disable: Check the ‘Enable’ option to activate the surcharge feature and include it in the total payable amount.
Applicable Card Type: Select the card type for which surcharge has to be added.
”Surcharge Text” displayed on Thank You page
Surcharge Text: Enter the text to display the surcharge breakdown on the ‘Thank You’ page.
Applicable Amount Type: Select either “Fixed” or “Percentage” from the dropdown menu to determine how the surcharge will be calculated.
Amount: Enter the specific amount if “Fixed” is selected or enter the percentage to be applied to the total payable amount if “Percentage” is selected.
”Surcharge Message” displayed on Order Pay page
Surcharge Message: Configure a message to display the surcharge on the ‘Order Pay’ page. You can use the following variables for dynamic content:
{{MG_CARD_TYPE}} – Displays the card type (Credit Card/Debit Card). {{MG_SUR_AMT}} – Shows the surcharge amount applied. {{MG_SUR_PCT}} – Displays the surcharge percentage. {{MG_TOTAL_AMT}} – Indicates the total amount payable by the customer, including the surcharge.
Here is an example message. It shows how surcharges and totals are displayed during payment. When using a {{MG_CARD_TYPE}}, an additional surcharge of {{MG_SUR_AMT}} ({{MG_SUR_PCT}}) will be applied, bringing the total payable amount to {{MG_TOTAL_AMT}}.
Note
To find out if you can add surcharges to card payments in your region, contact your payment service provider or check the card scheme for card payments and regulations in your region.
Click the “Save Changes” button to save the modifications made on the ‘Mastercard Gateway Configuration’ page.