OpenCart – Mastercard Gateway
Created date: 05-04-23 |
Updated date: 19-06-25 |
Plugin version: 1.3.2 |
API version: 100


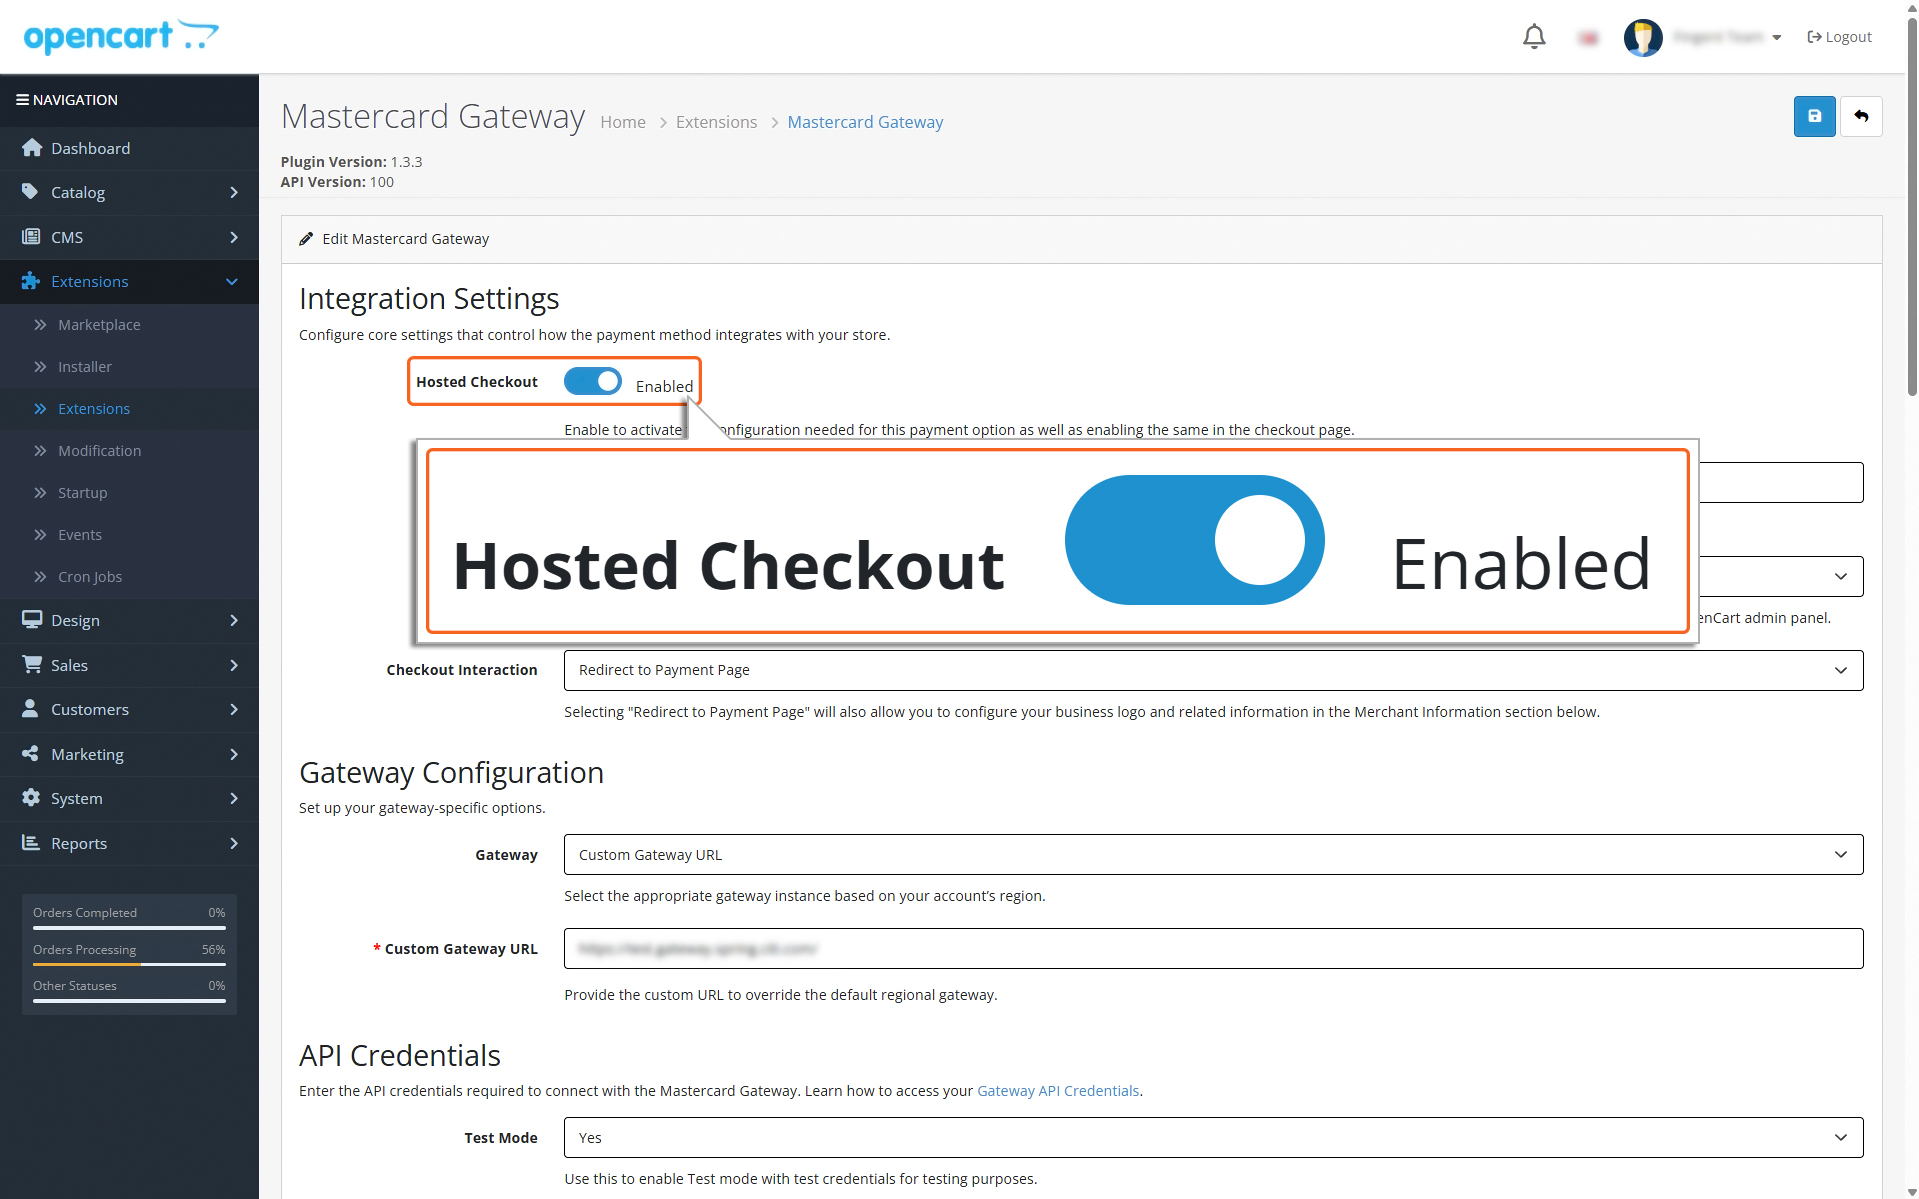
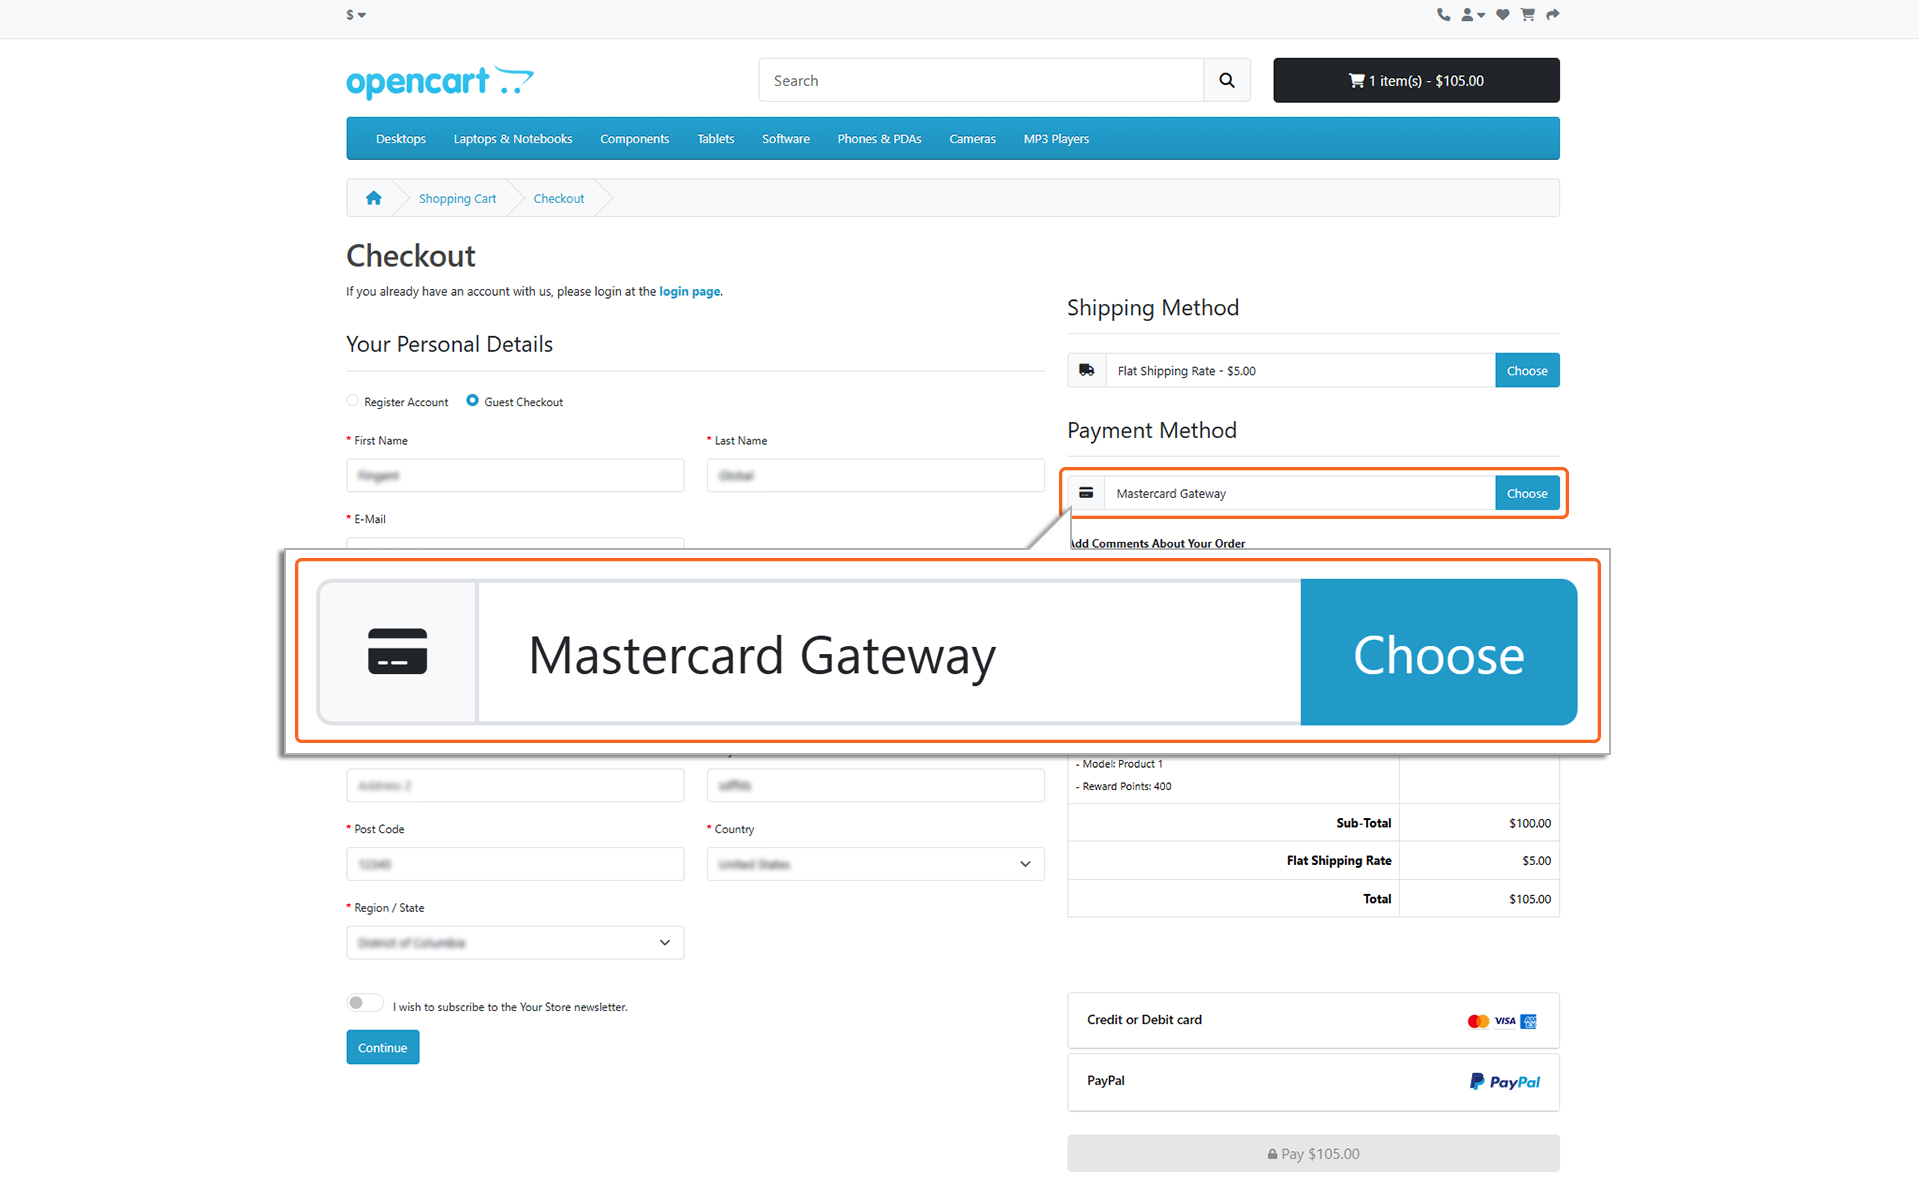
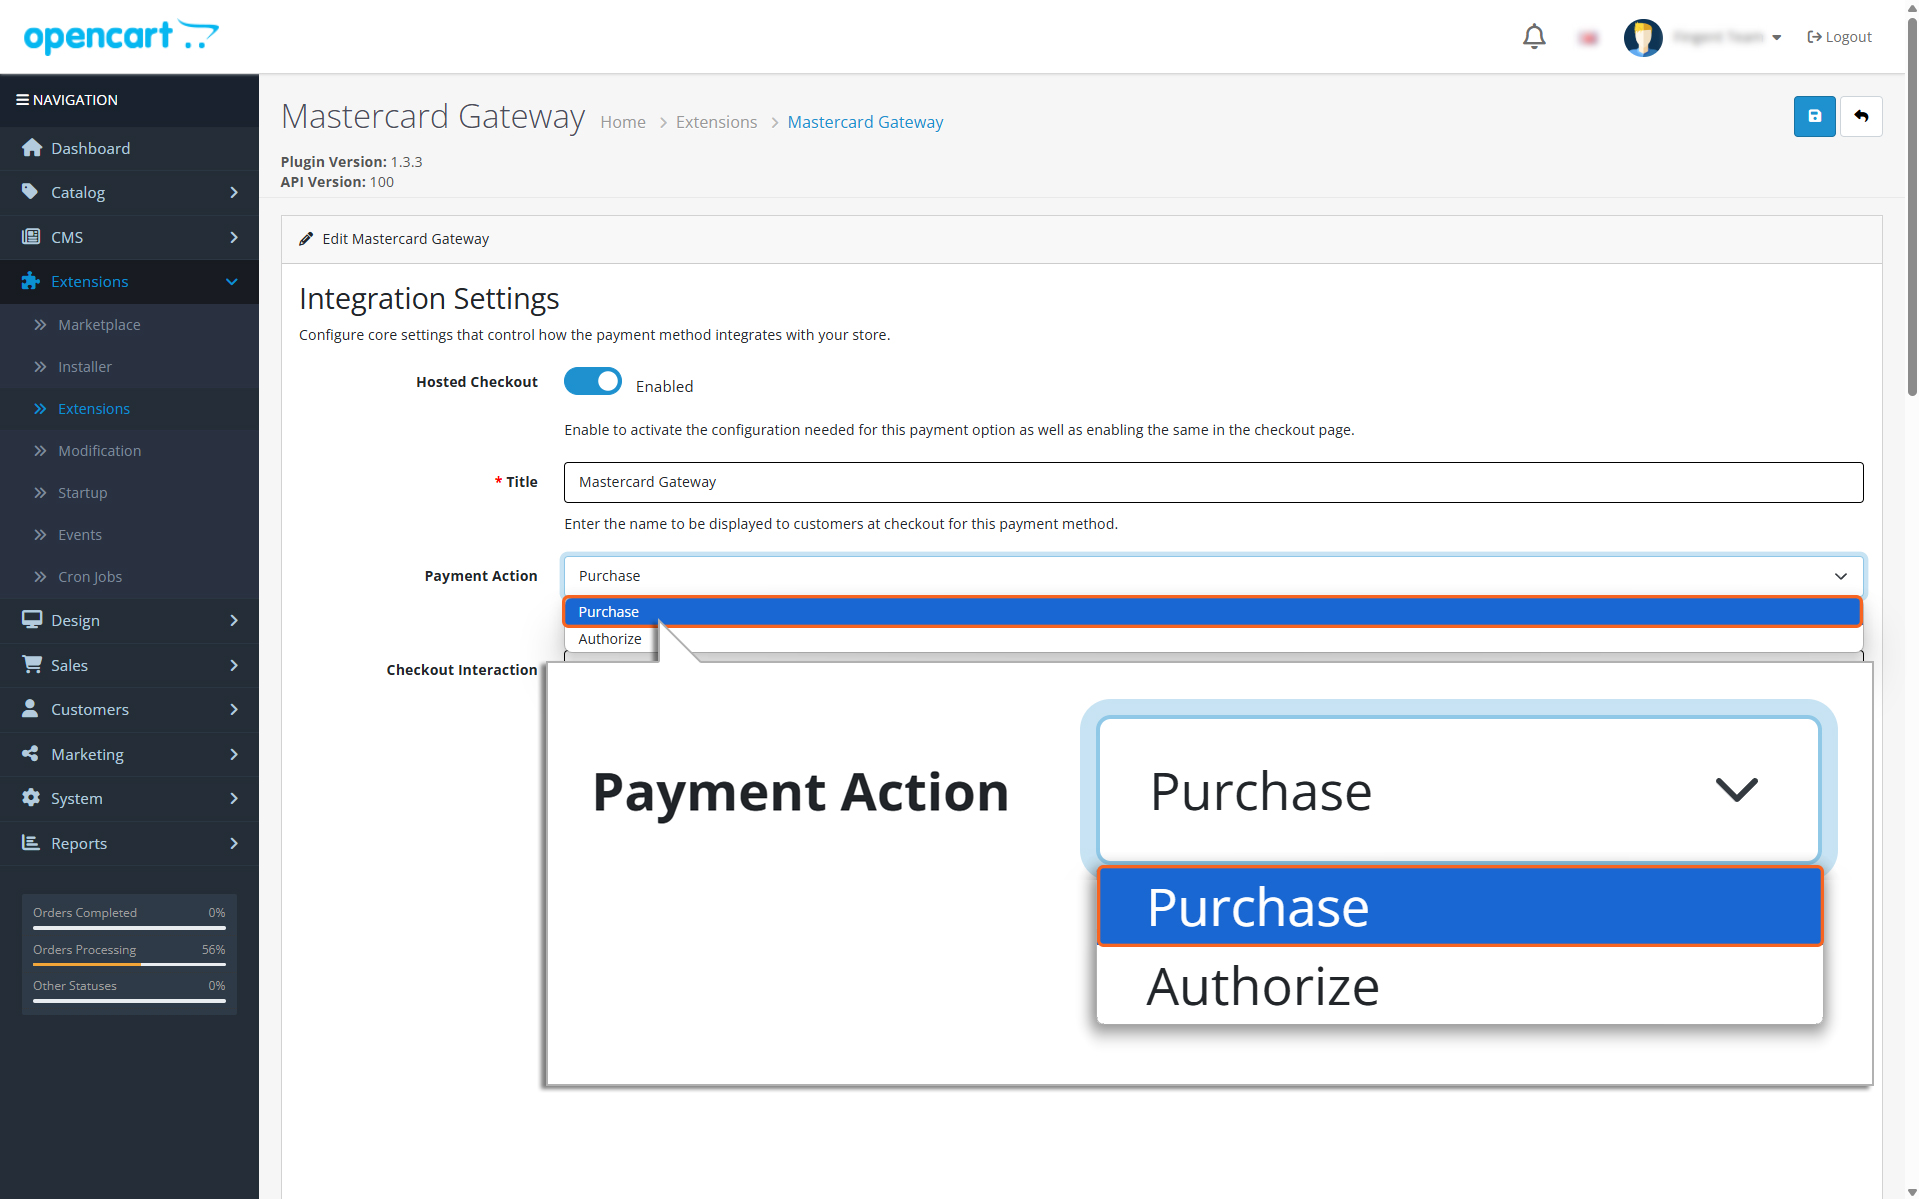
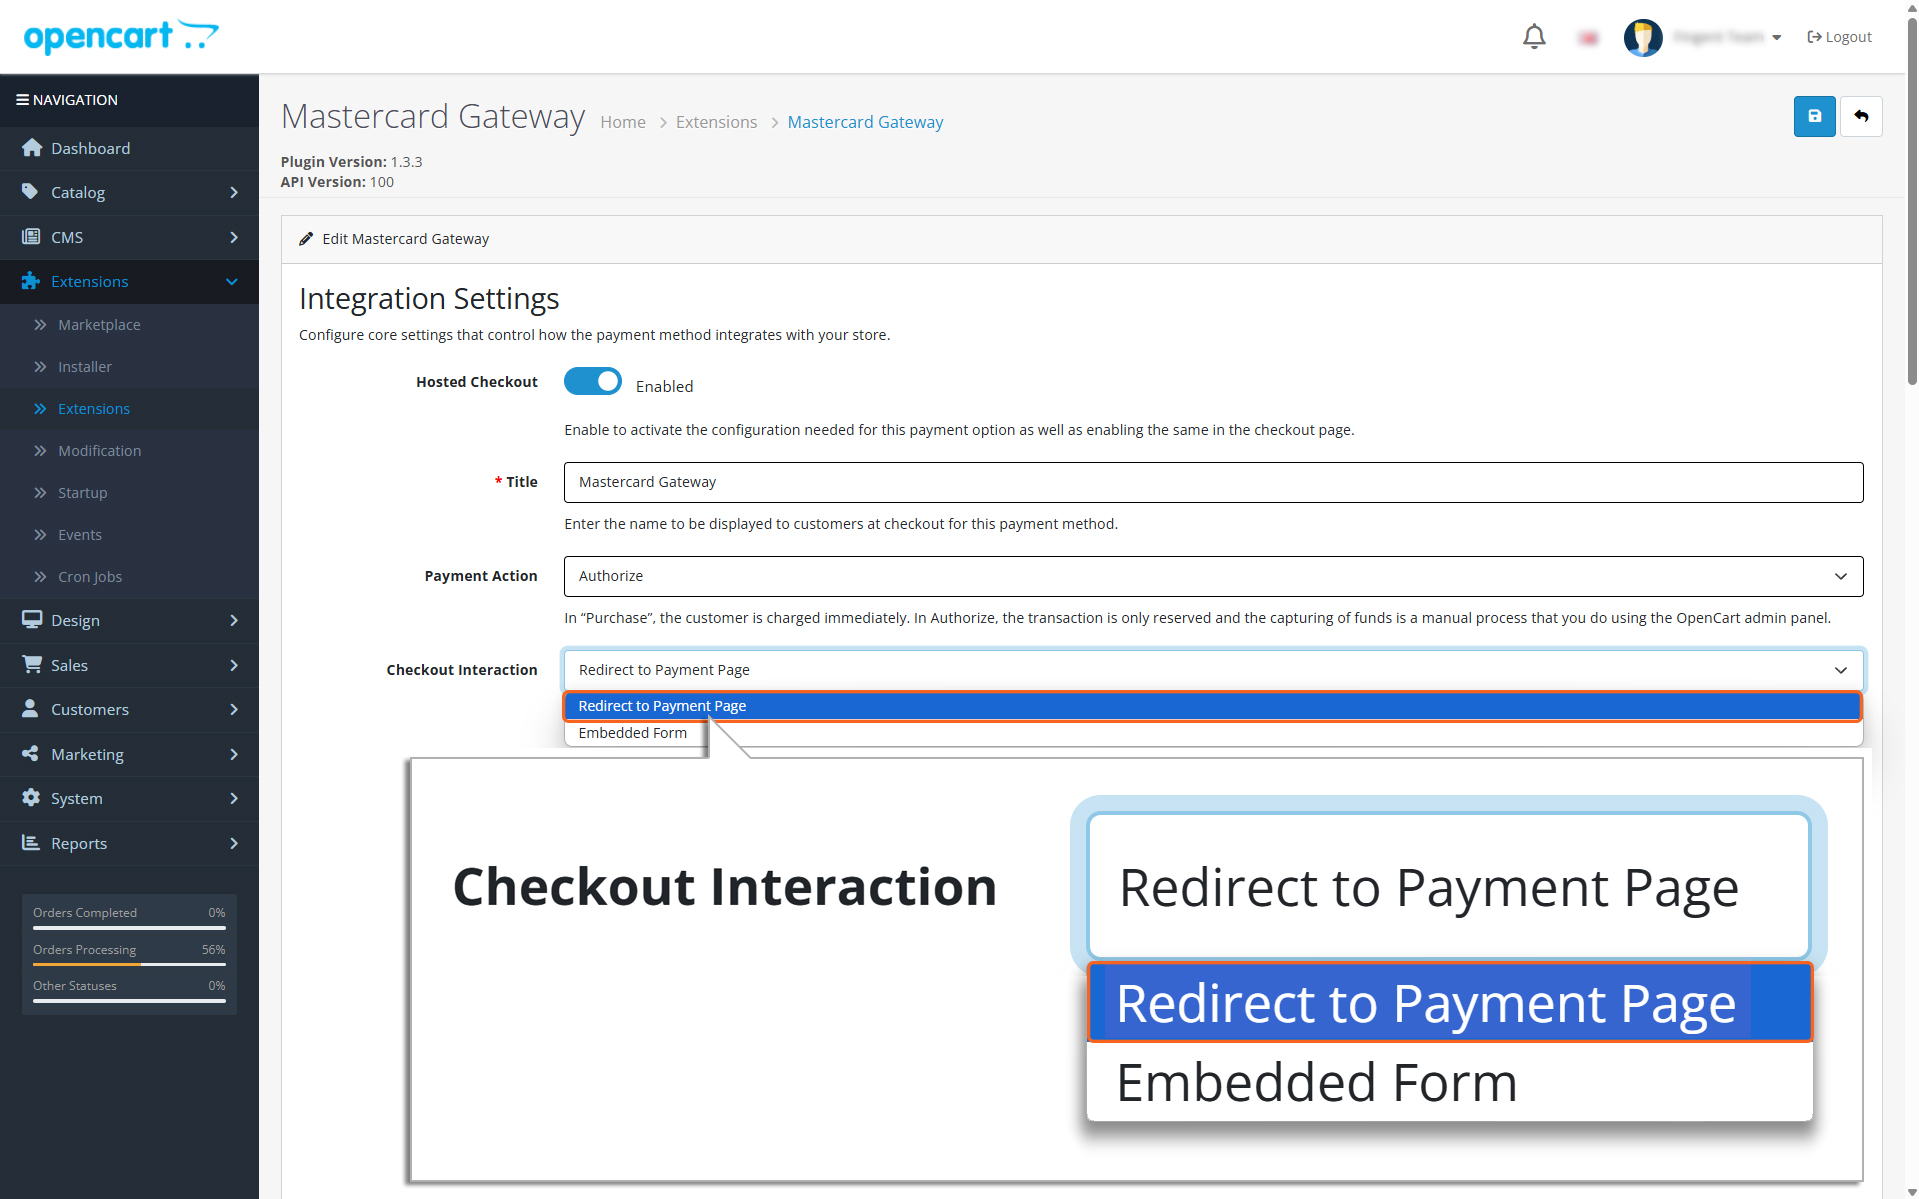
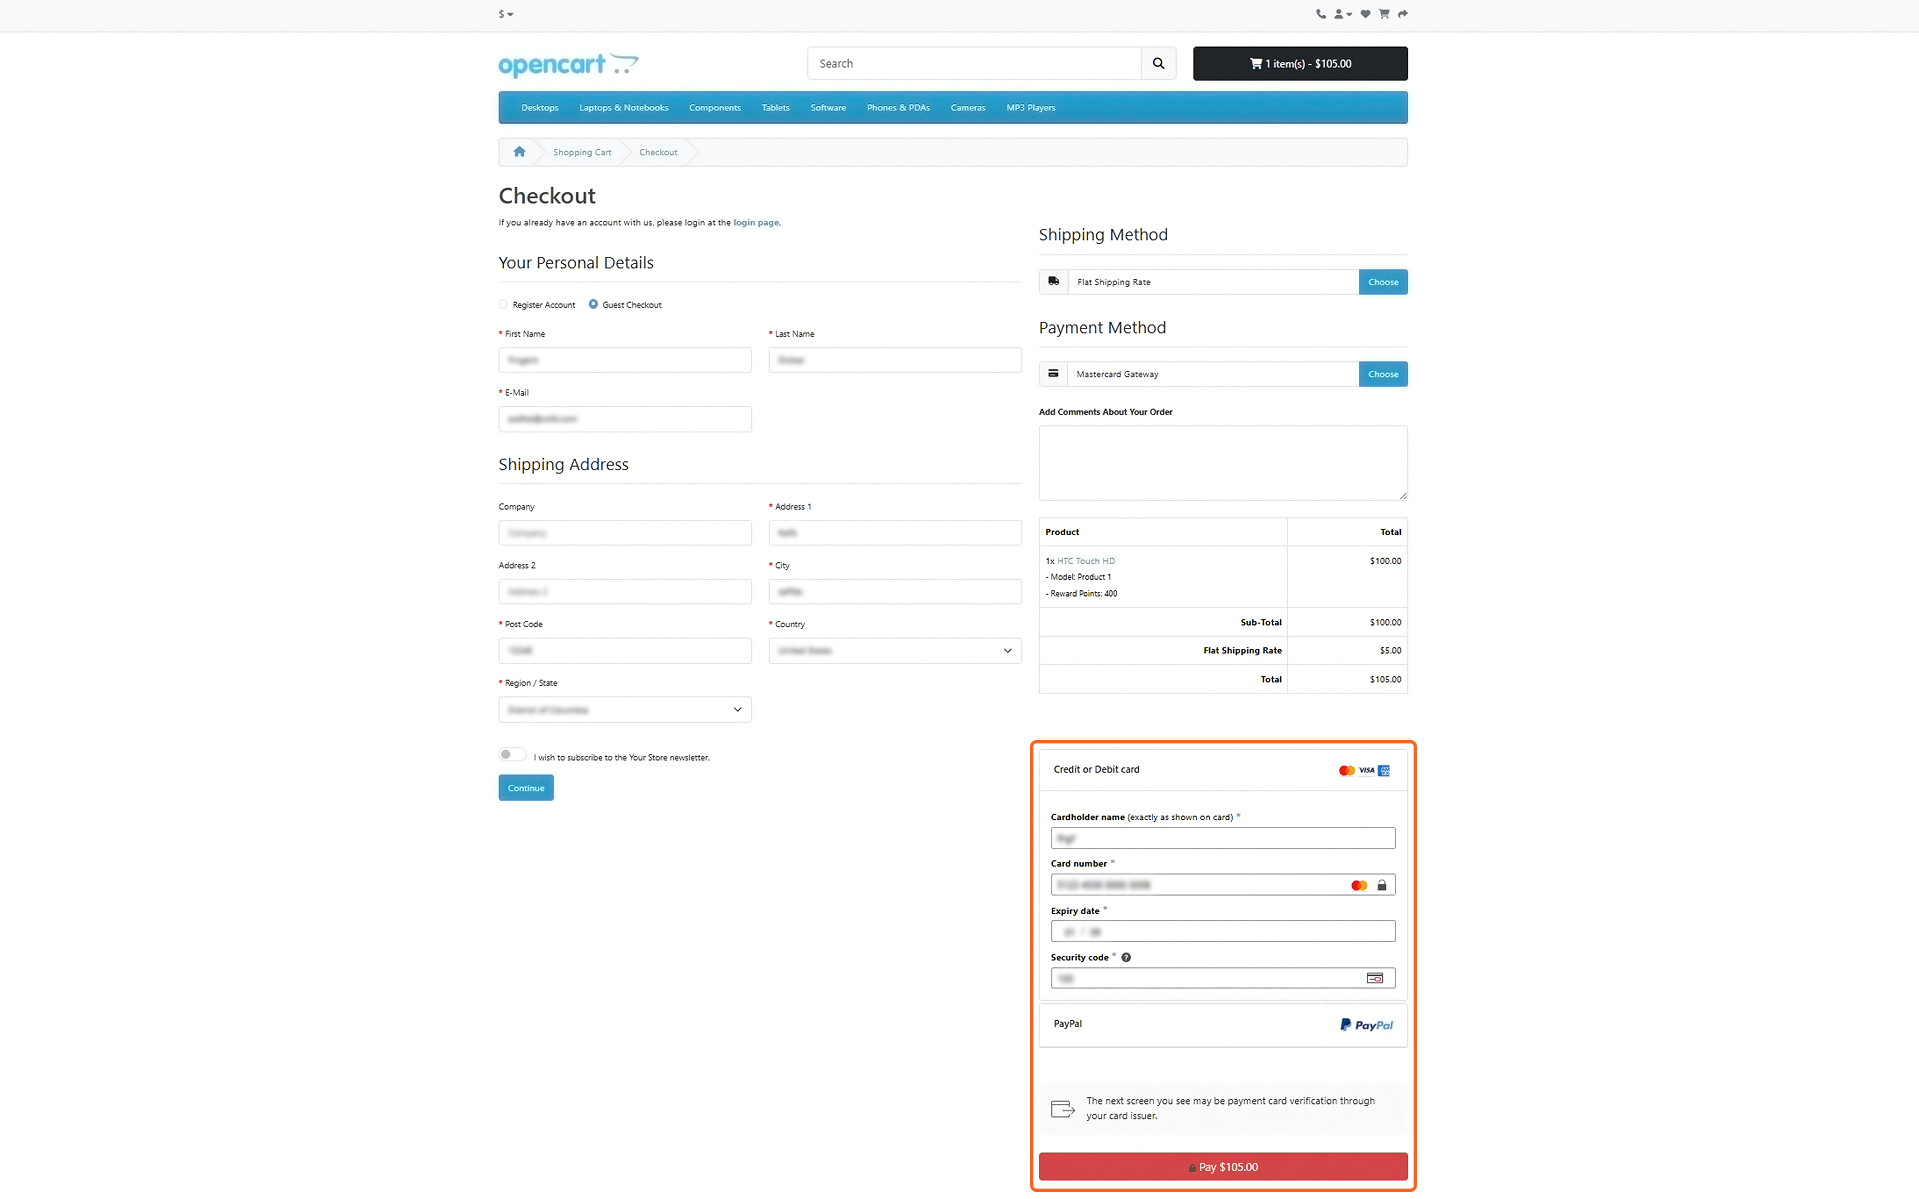
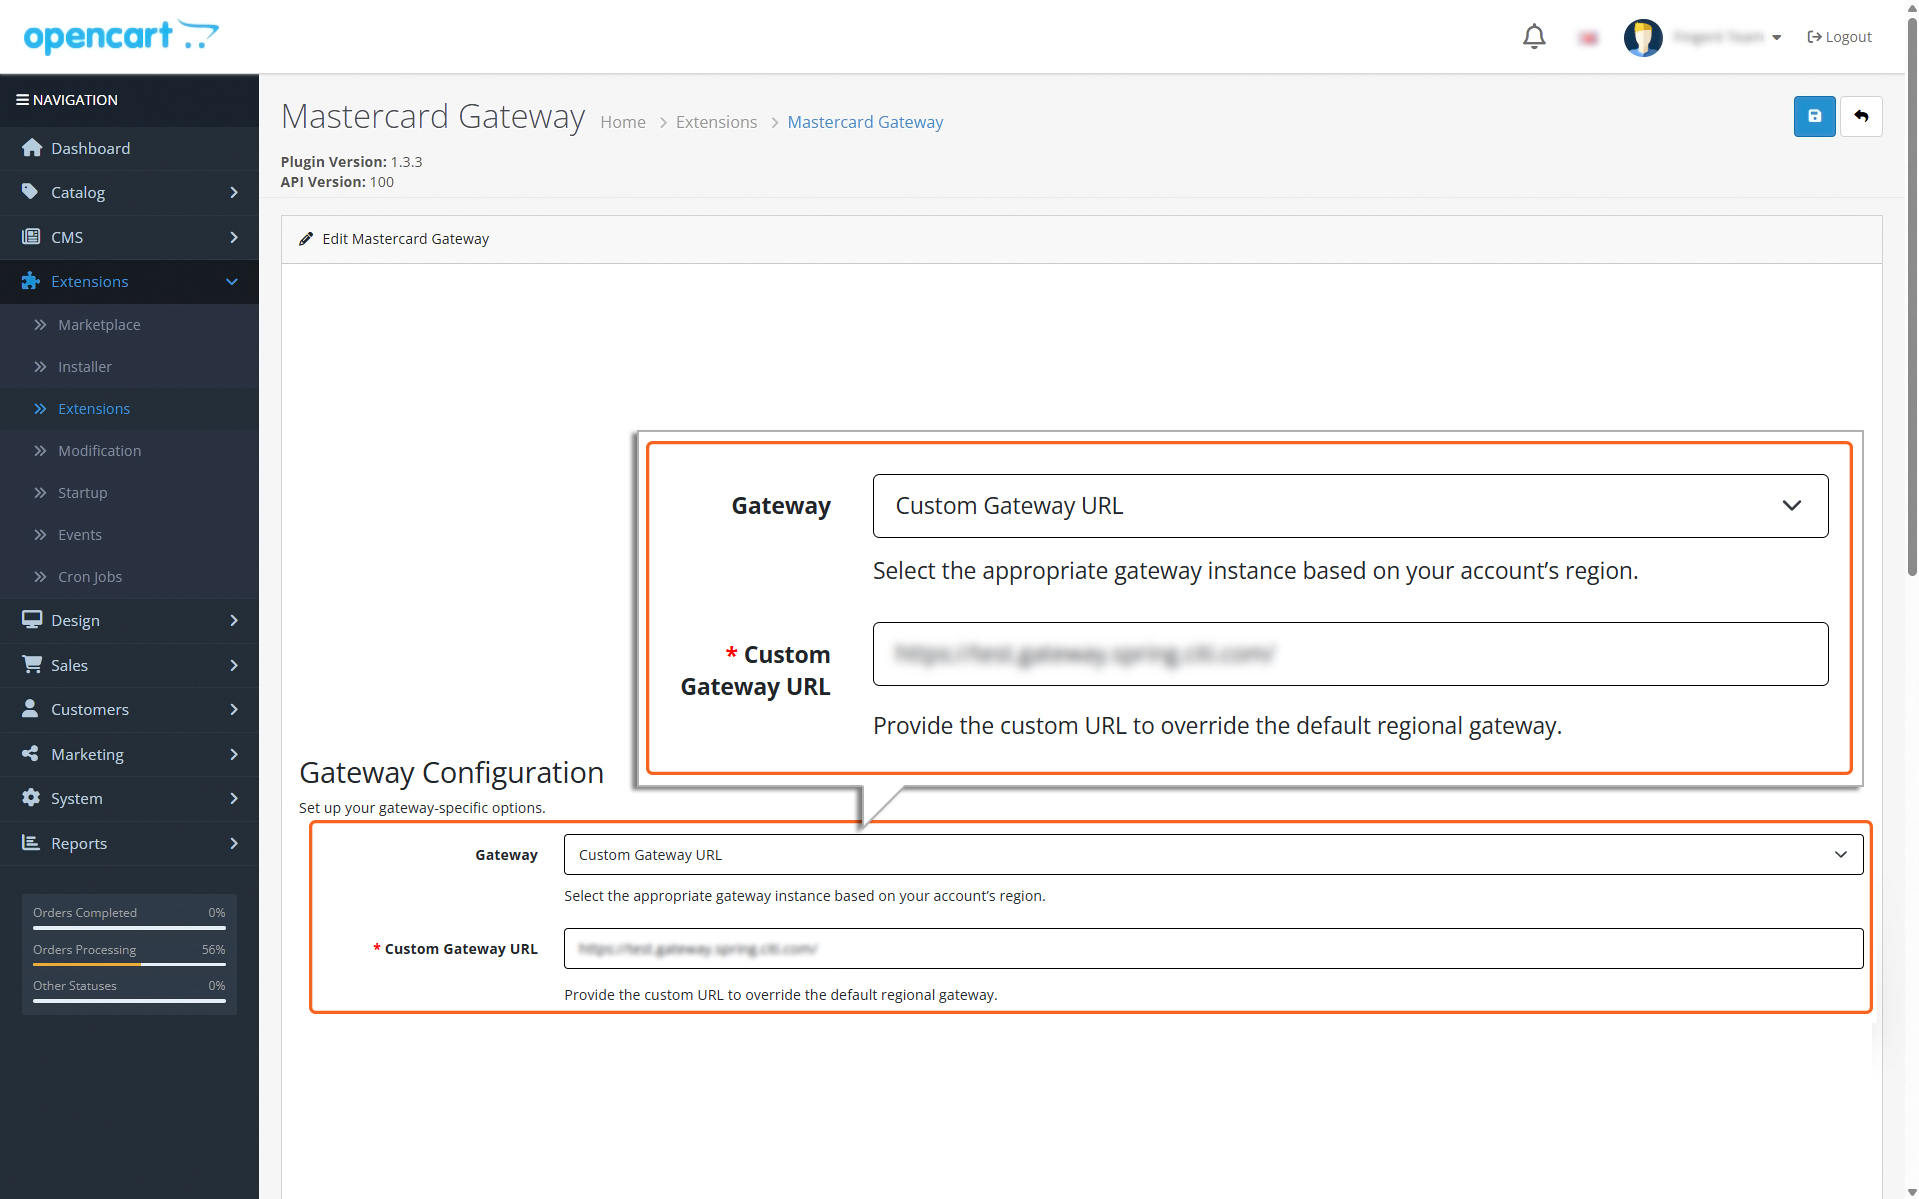
Gateway Settings