Home > PrestaShop – Mastercard Gateway > Configuration

PrestaShop – Mastercard Gateway

Created date: 06-04-23   |   Updated date: 15-09-25   |   Plugin version: 1.4.4  |   API version: 100

Configuration

Once the Mastercard Gateway Services extension is installed, follow these steps to access and configure it:

1. Access the Configuration Menu

Prestashop Admin Login Page
PrestaShop Login Page
  • First, log in to your PrestaShop Admin Panel.
Prestashop Admin dashboard
Admin dashboard
  • After logging in, you will be redirected to the Admin dashboard.
Navigate to Modules then to Module Manager
Modules → Module Manager
  • Navigate to the menu on the left side and follow this path: Modules → Module Manager
Image of module manager with category filter dropdown highlighting payment option
Category → Payment
  • Under the Modules Tab, choose the Category dropdown → Payment.
Locate Mastercard gateway and its associated Configure button from module manager list
Mastercard Gateway

2. Locate the Mastercard Module

  • Scroll down the page until you find the module labeled Mastercard Gateway and click on the Configure button option next to it.
Mastercard Gateway Options

3. Configure the Extension

  • In the Mastercard Gateway module, you’ll see options to how you want to configure the payments. There are three sections to configure fields:
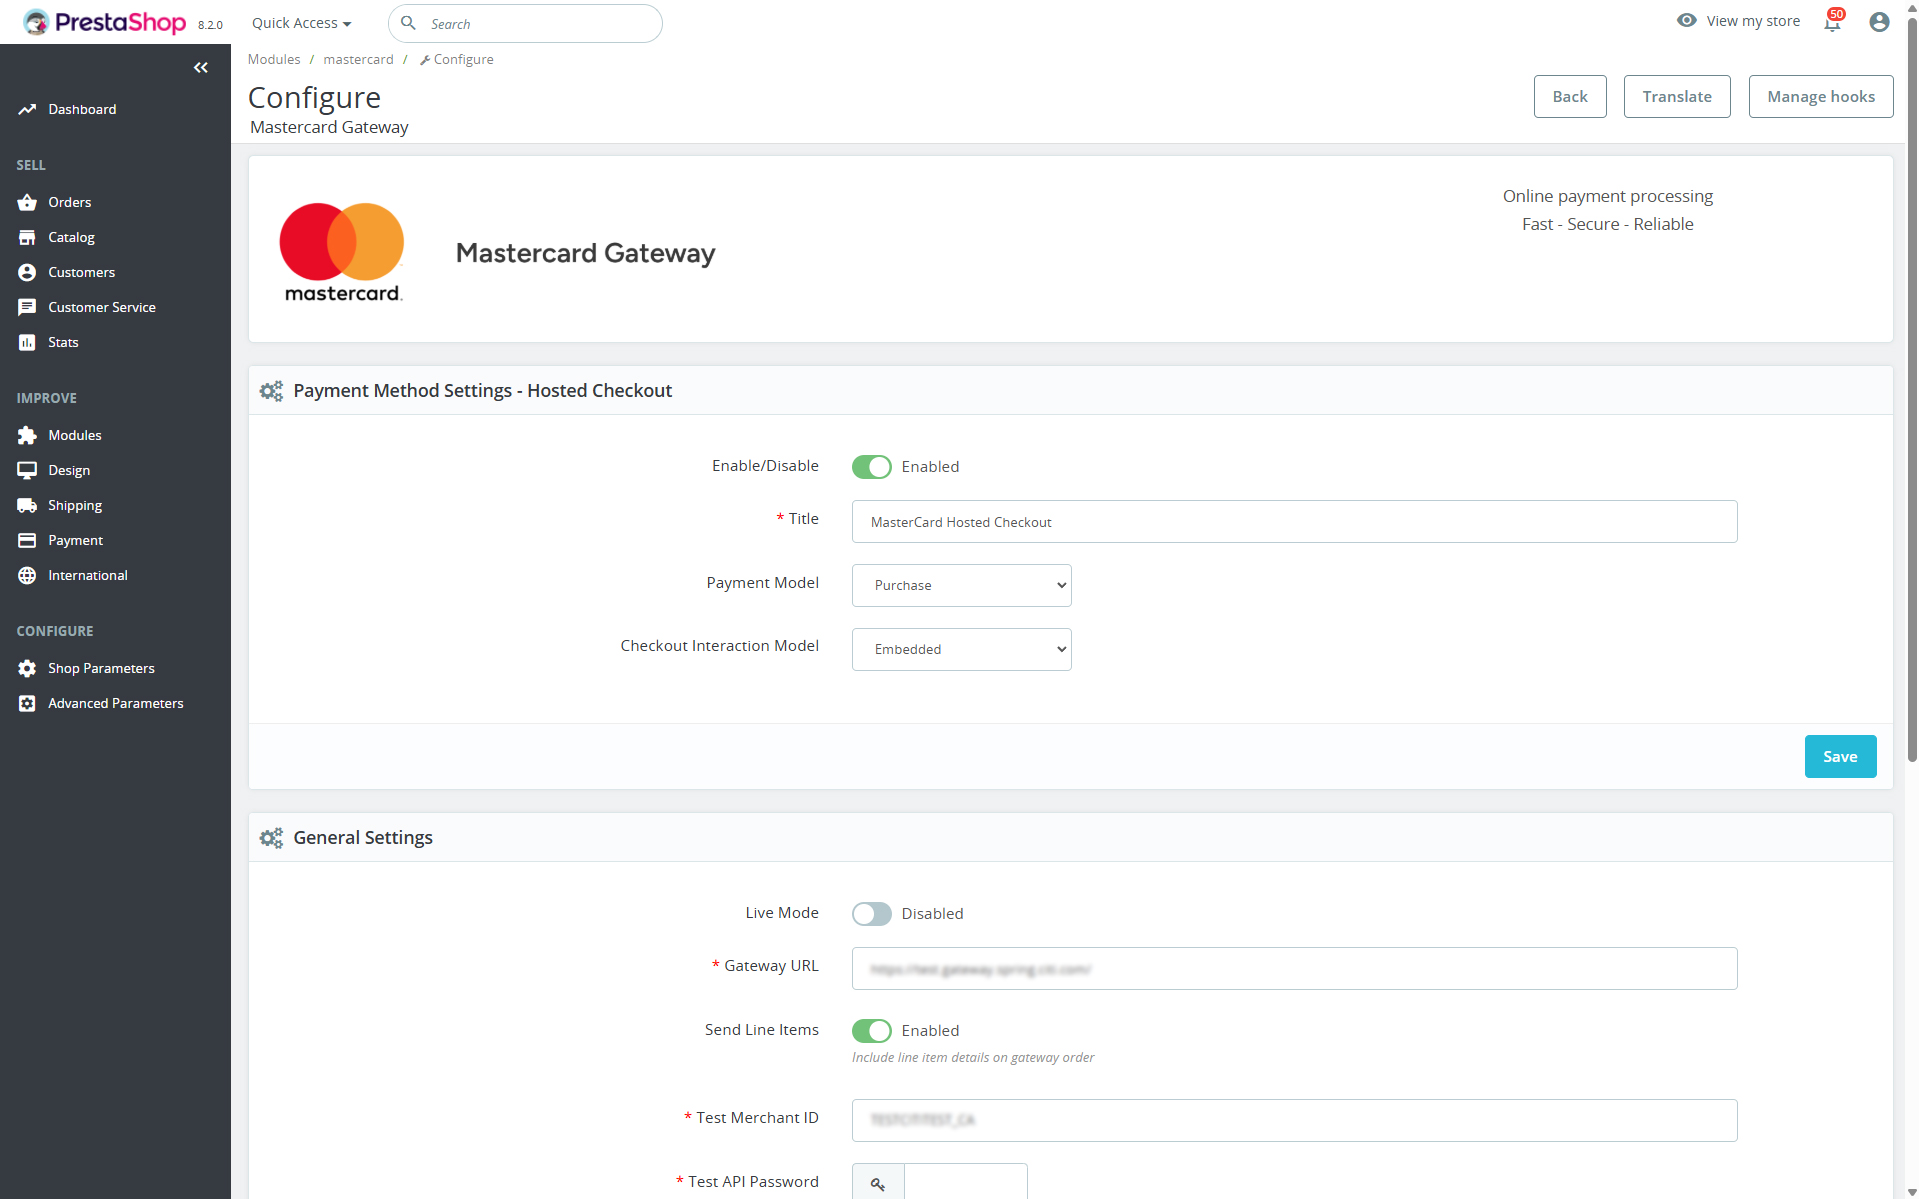
    • General Settings: In the ‘General Settings’ section, you can select the Mode, Merchant ID, API Password, API Endpoint, etc., for your payment gateway.
    • Payment Method Settings – Hosted Checkout: In this section, you can specify Payment Model options, Checkout Interaction Model, and more.
    • Advanced Parameters: In the ‘Additional Parameters’ section, you can select the Logging Verbosity, Gateway Order ID Prefix, and Custom Webhook Endpoint.